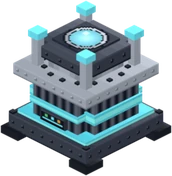
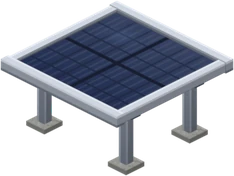
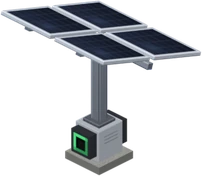
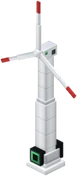
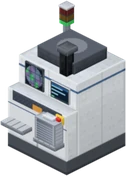
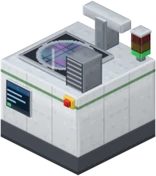
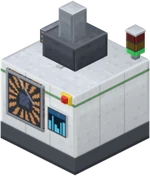
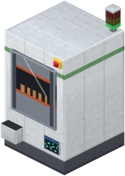
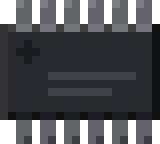
日本語EN
Download

ENECRA v1.7GuidebooksParts guide

Save as PDF14.2MB

The PDF has every spoiler step opened.

ENECRA · v1.7

Every block and itemParts guide and recipes

All 511 kinds of ENECRA blocks and items in the Creative inventory, in the order of its 12 groups: what each one does, how to use it and where to get it. Crafting table and machine recipes (32), key numbers and troubleshooting are on this page too. For how to play the quests, see ENECRA Quest and the town’s residents; for lessons, see Teacher Tablet and ENECRA Missions.

511 kinds149 entries32 recipes12 groups

“Sells for” is the price when you sell something you made or were given to a shop. Things you bought at a shop are taken back for 70% of what you paid (the subsidy part isn't included).

FOLDER1

Tools

Phone, tablets, undo, monitor · 6 kinds

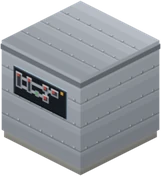
ENECRA Phone

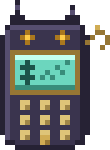
ENECRA Phone

The tool for playing in Survival. Everyone who enters a world for the first time gets one (everyone in Survival; in Creative, only the world's owner). Hold it and use it to open it; press the power button to start it, and you switch to Survival (Easy or Hard) with only the phone in your inventory (your items until then are kept safe and come back when you shut down). The home screen shows your money, the time and how the town is doing, with four buttons: Town, Quests, Mail and Book. When a resident wants to move in or there is a blackout, an incoming call appears first when you open it. While it is started, it comes back to you if you drop it or die. If you lose it before turning it on, you can make one at a crafting table (search for the phone's name with the crafting table's magnifier). The globe button on the top edge (left of the ×) of the start screen and the power screen lets you choose the language (Japanese / English): the world owner's phone sets the world's language, anyone else's phone changes only their own screens.

How to make
Crafting table: iron ingot x4 + glass pane x1 + copper wire x3 + gold nugget x1
In real life
The screen is glass and the frame is metal (aluminum or stainless steel in real ones). The board inside has copper wiring and gold contacts. Real ones also have a Li-ion battery and silicon IC chips (parts made in factories).

Teacher Tablet

Teacher Tablet

The tool the teacher uses to run training (a lesson). It is first in the Tools group of the Creative inventory. Only players with operator permission can start training. When training starts, everyone taking part switches to Creative, and the time is fixed at daytime with clear weather. Everyone's current items (including armor and the off-hand item) are kept safe and come back to the same slots when training ends. There are eight buttons (Choose missions, Progress list, Give to one, Advance all, Hand out again, Demo, Language, End training); in a world with Build Space plots, Build Space appears too. The globe button at the top left of the power screen before training, and Language, set the world's language (for everyone). During training the ENECRA Phone can't be started, and items thrown with the Q key come back to the player's hand.

ENECRA Tablet

ENECRA Tablet

The mission tool students use. When training starts, it is given automatically to the left end of each student's hotbar (it can't be let go of during training), and it is collected when training ends. The top of the screen shows the mission set and how many are cleared, with tabs 1 to 4 below. Each tab shows the goal, the steps (how far along you are), the handouts and key points. The top right of the screen shows the current mission and step number (for example, Mission 3-4). In Missions 3 and 4, glowing dots mark the equipment used in the current step (only that player can see them). The globe button on the top bar changes the language of your own screens only.

Builder Undo (one at a time, newest first)

Builder Undo (newest first)

A tool that puts whatever you built with a builder back to how it was before. It remembers each player's last 8 builder uses and undoes one each time, newest first (it tells you what it undid and how many more you can undo). Blocks that were there before come back, and the builder you used returns to your inventory (it drops at your feet if your inventory is full). It only undoes builders you used yourself. Things people placed by hand afterwards (connecting pipes and so on) stay. It remembers only until you leave the world, so use it right after a mistake. When you receive a builder in a quest or mission and don't have an undo tool, you get one.

Town Power Monitor

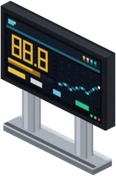
Town Power Monitor

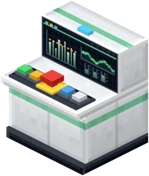
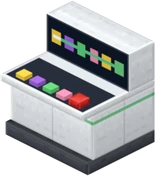
A board that shows all of the world's power generation in one place (it isn't a generator; it glows softly). Right-click it to see: generators producing / connected, the town's total output (kW), homes (counting 1 home = 1.0 kW) = about how many people (3 per home), power sold (what the Power Company actually bought, in yen per game hour), the energy mix (solar, advanced solar, wind, hydro, nuclear turbines, thermal turbines, PWR and emergency diesel, largest output first) and the number of batteries and their charge. Below that are a graph of your mix of sources and the "next source to add".

Light level
5

Projector

Projector

A projector that shows a picture in the air. It gets power the same way as an LED (place it next to a wire, or indoors connect it to an outlet with a power cord; 150 W). Right-click it to see the 10 pictures inside; choose one, then choose the size (wide small / medium / large, tall small / medium / large). The picture floats right above the projector and faces the person who placed it. It doesn't show without power. To show your own pictures, on a PC put them in Minecraft's folder (com.mojang) > resource_packs > the ENECRA folder > textures > projector_images (for an English world, the en folder inside it) named 1.png to 10.png, then restart Minecraft (reinstalling ENECRA puts the originals back, so keep your pictures somewhere else too).

FOLDER2

Electricity Basics

4 generators, wire, battery, LEDs · 11 kinds

Solar Generator

Solar Generator

Turns sunlight into power. It makes power only while it can see the sky above, up to 1.0 kW at its strongest (one home's worth). At night (game time 13000 to 23000) it makes 0, and in rain or thunderstorms 0.2 times as much. Even one pane of glass or one leaf block in the column above it drops it to 0. Right-click it for the monitor (output, how much it would earn, a graph); sneak and right-click for a small battery panel. Bought from the Electronics Dealer, it costs half thanks to the subsidy.

How to make
Crafting table: solar panel x2 + electronic circuit x1 + iron ingot x2
Where to buy
Electronics Dealer 250,000 yen (half with the subsidy: you pay 125,000 yen)
Sells for
10,908 yen (Trader, Electronics Dealer)
In real life
An electronic circuit (power conditioner) turns the panels' DC power into AC you can use at home.
You get it
When you take the quest “First Power”, “Renewables complete” (with the phone started)
Mission
Handed out in “Power to Homes” mission 1 (teacher tablet training)

Advanced Solar Generator

Advanced Solar Generator

A solar generator with bigger panels. It works the same way as the Solar Generator, with 6 times the output (6.0 kW at its strongest). It also makes 0 at night and 0.2 times as much in rain. It looks big, but it is one block, and it only looks at the single column above it.

How to make
Crafting table: solar panel x6 + electronic circuit x1 + iron ingot x2
Where to buy
Electronics Dealer 1,500,000 yen (half with the subsidy: you pay 750,000 yen)
Sells for
30,890 yen (Trader, Electronics Dealer)
In real life
A big solar plant with lots of panels lined up.
You get it
When you take the quest “Renewables complete” (with the phone started)
Mission
Handed out in “Power to Homes” mission 1 (teacher tablet training)

Wind Generator

Wind Generator

Makes power by turning its blades in the wind. It ignores the time and the weather, so it keeps going at night and in rain. Its strength depends on height: 1.2 kW at Y=24 or below, 9.6 kW at Y=320 (about 2.3 kW at normal ground level, Y=64). The wind keeps changing between 0.5 and 1.2 times with slow waves and small gusts, so the numbers always move. It stops if the blades (4 blocks above the base) don't reach open sky. The monitor shows wind speed, height and rotation speed.

How to make
Crafting table: glass x2 + resin (plastic) x1 + neodymium magnet x2 + coil x1 + iron ingot x2 + electronic circuit x1
Where to buy
Electronics Dealer 440,000 yen (half with the subsidy: you pay 220,000 yen)
Sells for
2,689 yen (Trader, Electronics Dealer)
In real life
The blades are glass fiber and resin. Inside, magnets spin and make power in the coils (same as the generator in 6th-grade science).
You get it
When you take the quest “Renewables complete” (with the phone started)
Mission
Handed out in “Power to Homes” mission 1 (teacher tablet training)

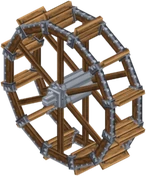
Hydro Generator

Hydro Generator

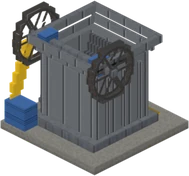
Makes power by turning its water wheel with water. Day, night and weather don't matter. Put water on one side of the wheel (the same amount on both sides cancels out and stops it). Falling water (a waterfall) is stronger than ordinary water, up to 450 W at its strongest. The smallest of the four generators. Sold by the Electronics Dealer (half price with the subsidy).

How to make
Crafting table: iron ingot x5 + neodymium magnet x2 + coil x1 + electronic circuit x1
Where to buy
Electronics Dealer 300,000 yen (half with the subsidy: you pay 150,000 yen)
Sells for
2,572 yen (Trader, Electronics Dealer)
In real life
Water power turns the wheel, and magnets and coils make power.
You get it
When you take the quest “Renewables complete” (with the phone started)
Mission
Handed out in “Power to Homes” mission 1 (teacher tablet training)

Wire

Wire

The path that connects generators to the things that use power (called "cables" up to v1.4). Placed next to each other, wires reach out and connect automatically, and they glow while power flows. Power drops by 1% for every block, and one network can follow up to 1024 wires (power doesn't reach beyond that). Hold a wire and right-click the green port face of a device that takes wires, and the wire is placed right there (no need to hold Shift). Port colors: green ports are for wires, light blue ports for water pipes and red ports for steam pipes (wires don't connect to light blue ports). The green wire is for outside buildings: it doesn't connect to outlets inside a house (indoors, use Indoor Wiring and power cords).

How to make
Crafting table: copper wire x2 + resin (plastic) x1 (makes 4)
Where to buy
Electronics Dealer 800 yen (x8)
Sells for
30 yen (Trader, Electronics Dealer)
In real life
Copper wire covered with resin that doesn't conduct electricity.
You get it
When you take the quest “Lights on!”, “Light up the night”, “The house has power”, “Run a thermal plant”, “Get the train moving”, “Run a nuclear plant”, “Made MOX fuel” (with the phone started)
Mission
Handed out in “Power to Homes” mission 2, 3, 4 (teacher tablet training)

Battery

Battery

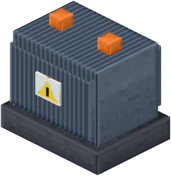
A box that stores power and sends it later. It charges by itself while generators have power to spare (it holds 400,000 J). Right-click to switch between "Send" and "Store only". A battery you place by hand starts in "Store only", so set it to "Send" before night (deciding when to use the power is the battery's job). The windows on the front and back and the meters on the sides light up in 10 steps, so you can see the charge from outside. The right-click screen shows the charge (% and kWh counted in game time, and about how many hours it can run one home). Full is 8.0 kWh = one home for about 8 hours (the same way the Electronics Dealer's menu, power selling and bills count it; a game day is about 20 real minutes, so that is about 7 real minutes).

How to make
Crafting table: iron ingot x5 + electronic circuit x1 + Li-ion battery cell x3
Where to buy
Electronics Dealer 960,000 yen
Sells for
5,587 yen (Trader, Electronics Dealer)
In real life
Lots of Li-ion batteries connected together, with an electronic circuit watching over them.
You get it
When you take the quest “Light up the night” (with the phone started)

LED lights, 5 kinds (Black, Blue, Brass, Filament, Paper Lantern)

5 kinds
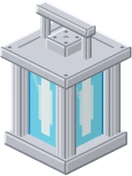
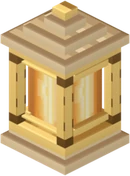
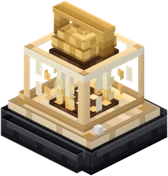
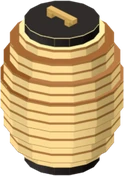
Black LEDBlue LEDBrass LEDFilament LEDPaper Lantern LED

Lights that glow when power reaches them (light level 15, the brightest). All five work the same way and use 50 W each. Only the look differs (the model homes use Black for modern, Paper Lantern for Japanese style, Brass for the log house, Filament for the brick house). They light when they touch a wire that has power, or indoors when connected to an outlet with a power cord (just placing one next to an appliance doesn't light it). Hostile mobs don't spawn within 32 blocks of a lit light. When the power stops, they stay lit for a little while (on what they stored).

See data for 5 kinds
Black LEDBlack LED
Blue LEDBlue LED
How to make
Crafting table: glass x3 + LED chip x2 + electronic circuit x1 + aluminum ingot x1 (makes 4)
Sells for
682 yen (Trader, Electronics Dealer)
In real life
A gallium nitride chip glows blue. Aluminum carries the heat away.
You get it
When you take the quest “Lights on!” (with the phone started)
Mission
Handed out in “Power to Homes” mission 2 (teacher tablet training)
Brass LEDBrass LED
Filament LEDFilament LED
Where to buy
Electronics Dealer 1,000 yen
Sells for
300 yen (Trader, Electronics Dealer)
Paper Lantern LEDPaper Lantern LED
FOLDER3

Living

Breaker panels, outlets, appliances, food, clothes · 66 kinds

Model Home Builder (one-shot build)

Model House Builder

Builds a whole house in one go. Right-click the ground for a design screen and choose from five: the modern house, the stone-and-wood Japanese garden house, the log house, the brick house and the ice house (press the × at the top if you opened it by mistake). On a 9 x 7 floor it builds the walls, ceiling, roof and furniture, six appliances (refrigerator, microwave, washing machine, air conditioner, TV and charging stand), the ceiling light, outlets and the breaker panel. Power cords are not connected: hold a power cord and right-click an outlet and then an appliance to connect them. Connect the wire from a generator to the green port on the back of the breaker panel, on the outside wall of the house, and power comes in (the builder doesn't place a wire outside the house). The builder is used up, and comes back if you undo.

You get it
When you take the quest “The house has power” (with the phone started)
Mission
Handed out in “Power to Homes” mission 4 (teacher tablet training)

Breaker Panel

Breaker Panel

Where power enters a house. Power from outside (wires, the Power Company's grid, a switchyard) comes in here and goes out to every outlet in the house. It also has a breaker that watches for overuse and trips if you use more than your contract (when it has tripped, the first right-click only resets it). The right-click screen shows the power in use and the contract, a breakdown by appliance, an estimated bill (31 yen per kWh by day / 18 yen at night; basic fee per month 311 yen for 10 A / 624 yen for 20 A / 935 yen for 30 A), the power this house has used, your money, and your power-selling contract with the Power Company. Changing the contract (10 A = 1 kW, 20 A = 2 kW, 30 A = 3 kW) is the Electrician's job in town. Power reaches outlets inside a box 8 blocks front, back, left and right and 6 up and down from the panel through wiring in the walls (the Electrician's wiring work widens it to 12 and 8, then 16 and 10).

Where to buy
Electronics Dealer 50,000 yen
Sells for
15,000 yen (Trader, Electronics Dealer)

Outlets (white, black, wood, sky blue, pink)

5 kinds
Wall OutletOutlet (Black)Outlet (Wood)Outlet (Sky Blue)Outlet (Pink)

Where appliances get power. Placed within the breaker panel's range, it gets power without any indoor wiring (wiring in the walls). Outside the range, connect it to the breaker panel with Indoor Wiring. On a wall it is a normal outlet, on a ceiling (the underside of a block) a ceiling outlet, and on a floor a floor outlet. Up to two power cords per outlet (one plug at the top, one at the bottom). Hold or wear a wearable electric item and sneak in front of it to charge (it uses 120 W only while charging). Right-click it to see whether it has power, and the real reason if it doesn't. The four colors other than white are sold only by the Electronics Dealer.

See data for 5 kinds
Wall OutletWall Outlet
Where to buy
Electronics Dealer 500 yen
Sells for
150 yen (Trader, Electronics Dealer)
Power use
120W (all the time)
Outlet (Black)Outlet (Black)
Where to buy
Electronics Dealer 800 yen
Sells for
240 yen (Trader, Electronics Dealer)
Outlet (Wood)Outlet (Wood)
Where to buy
Electronics Dealer 800 yen
Sells for
240 yen (Trader, Electronics Dealer)
Outlet (Sky Blue)Outlet (Sky Blue)
Where to buy
Electronics Dealer 800 yen
Sells for
240 yen (Trader, Electronics Dealer)
Outlet (Pink)Outlet (Pink)
Where to buy
Electronics Dealer 800 yen
Sells for
240 yen (Trader, Electronics Dealer)

Power Cords (white, black)

2 kinds
Power Cord (White)Power Cord (Black)

The cord that connects an outlet to an appliance. Hold a power cord and right-click an outlet and then an appliance: a thin cord runs along the corner of the wall and floor, and the appliance gets power (one cord per appliance, up to two per outlet). The cord is only for looks and doesn't block the way. Sneak and right-click the appliance to unplug it back into your inventory. Breaking the outlet or the appliance drops the cord on the floor. It can connect appliances, LEDs, ceiling lights, light rails and the cleaning robot's charging dock.

See data for 2 kinds
Power Cord (White)Power Cord (White)
Where to buy
Electronics Dealer 1,000 yen
Sells for
300 yen (Trader, Electronics Dealer)
You get it
When you take the quest “Leave it to the robot” (with the phone started)
Mission
Handed out in “Power to Homes” mission 4 (teacher tablet training)
Power Cord (Black)Power Cord (Black)
Where to buy
Electronics Dealer 1,200 yen
Sells for
360 yen (Trader, Electronics Dealer)

Indoor Wiring

Indoor Wiring

The wiring inside a house that carries power from the breaker panel to outlets and sub-panels outside its range (shaped like real VVF cable). It reaches out in the directions it connects. It passes through a single wall or floor block and connects on the other side (no hole needed). It doesn't connect to the green outdoor wire, and it doesn't glow.

Where to buy
Electronics Dealer 1,200 yen (x8)
Sells for
45 yen (Trader, Electronics Dealer)

Sub-panel

Sub-panel

A breaker panel for big houses (houses with several floors). Connected to the main breaker panel with Indoor Wiring, it gives power to the same range around itself as the main one. The power, the breaker and the bill belong to the main panel's house. If indoor wiring comes from two breaker panels, it belongs to neither. Placed facing a wall from inside the room, it takes a wall-mounted shape.

Where to buy
Electronics Dealer 12,000 yen
Sells for
3,600 yen (Trader, Electronics Dealer)

Ceiling Light

Ceiling Light

A ceiling light (50 W). Put an outlet on the ceiling (right-click the ceiling to place it) and connect it with a power cord to light it. Right-click it to switch it on and off. In the model homes it is built switched on.

Power use
50W (while switched on)

Refrigerator

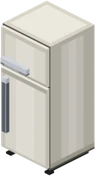
Refrigerator

An appliance that uses power around the clock (200 W). Right-click its lower part to open a 27-slot storage. While it has power, raw meat, fish, vegetables, milk and eggs inside don't go bad. When the power stops they start to spoil and eventually become rotten flesh. Breaking it drops what is inside on the ground.

Where to buy
Electronics Dealer 100,000 yen
Sells for
30,000 yen (Trader, Electronics Dealer)
Power use
200W (all the time)
You get it
When you take the quest “Keep the fish cold” (with the phone started)

Microwave Oven

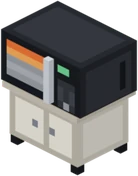
Microwave Oven

An appliance that uses a lot of power only while in use (600 W). Hold raw meat, fish or a potato and right-click to cook one at a time in about 3 seconds (it comes to your hand when done). Cooked food no longer spoils. If the power goes out while cooking, it stops and continues when power returns.

Where to buy
Electronics Dealer 15,000 yen
Sells for
4,500 yen (Trader, Electronics Dealer)
Power use
600W (only while in use)
You get it
When you take the quest “Ding! Dinner” (with the phone started)

Washing Machine

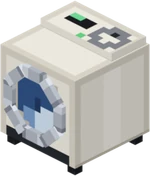
Washing Machine

An appliance that uses power only while running (500 W). Run it at night (time 13000 to 23000) and power costs 18 yen per kWh instead of 31 (it tells you the current price each time). Hold a piece of armor and right-click to wash it into gear with an energy mark (emblem) (see "Washed armor" below).

Where to buy
Electronics Dealer 60,000 yen
Sells for
18,000 yen (Trader, Electronics Dealer)
Power use
500W (only while in use)
You get it
When you take the quest “Review the contract” (with the phone started)

Room Air Conditioner

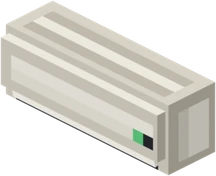
Room Air Conditioner

Uses 300 W while on. Right-click to switch it. Being outside at midday on a hot day or at night on a cold day makes you sluggish (you walk slower; no damage), but not within 8 blocks of a running air conditioner. The TV's Power Forecast tells you a day ahead whether a hot or cold day is coming.

Where to buy
Electronics Dealer 80,000 yen
Sells for
24,000 yen (Trader, Electronics Dealer)
Power use
300W (while switched on)
You get it
When you take the quest “Review the contract” (with the phone started)

Television

Television

Uses 100 W while on. Right-click to open its screen; turn it on to see the Power Forecast (the temperature today and tomorrow: heat wave / cold day / mild day, and the sky right now: clear / rain). The temperature forecast is always right. The sky follows normal Minecraft weather (ENECRA doesn't make it rain). Solar drops by 80% while it rains, so have other power ready.

Where to buy
Electronics Dealer 50,000 yen
Sells for
15,000 yen (Trader, Electronics Dealer)
Power use
100W (while switched on)

Electric Kettle

Electric Kettle

An appliance that boils water. Switch it on and it boils for 10 seconds, then turns itself off with a click (1200 W only during those 10 seconds). On a 10 A contract (1 kW) the kettle alone trips the breaker: if it goes 3 seconds without power, it stops. It works on 20 A. Sold only by the Electronics Dealer.

Where to buy
Electronics Dealer 3,000 yen
Sells for
900 yen (Trader, Electronics Dealer)
Power use
1.2kW (while switched on)

Charging Stand and Cordless Vacuum Cleaner

2 kinds
Charging StandCordless Vacuum Cleaner

The vacuum pulls in items within 6 blocks and the dust that builds up in the house (1 charge per use, 10 when full). A new one has no charge. Hold the vacuum and right-click the charging stand to leave it there; it is fully charged in about 10 seconds (a sound plays). Right-click with an empty hand to take it back. The stand uses 400 W only while charging. During a blackout charging doesn't progress (the vacuum stays there). Breaking the stand drops the vacuum with its charge kept.

See data for 2 kinds
Charging StandCharging Stand
Power use
400W (all the time)
You get it
When you take the quest “Cleaning Master” (with the phone started)
Cordless Vacuum CleanerCordless Vacuum Cleaner
You get it
When you take the quest “Cleaning Master” (with the phone started)

Cleaning Robot and Dock

Cleaning Robot and Dock

A cleaning robot bought outright from the Electronics Dealer (comes with a charging dock, 10 W). Put the dock against a wall and connect it to an outlet with a power cord, and the robot comes out and charges. When dust appears in the house, it goes out to clean on its own if its battery is at least half full (or right-click the dock or the robot and choose "Start cleaning"). Each bit of dust it picks up uses battery and fills the dustbin. It returns when its battery is low, there is no dust left or the dustbin is full (10). When it's full, choose "Empty the dustbin".

Where to buy
Electronics Dealer 40,000 yen
Sells for
12,000 yen (Trader, Electronics Dealer)
Power use
10W (all the time)
You get it
When you take the quest “Leave it to the robot” (with the phone started)

Trash Bin

Trash Bin

A sorting trash bin. It sorts two things: the dust collected by vacuums, and the metal scraps made by reprocessing. Hold one and right-click to choose where it goes (Burnable trash / Metal resources). Dust goes into burnable trash. Metal scraps go into metal resources: this is "clearance", where radiation is measured to confirm it is safe before it becomes a resource again, and you get the same number of iron ingots back. If you choose wrong, nothing is taken away; it tells you the right place (learning without punishment).

Fan Jacket and Heated Vest

2 kinds
Fan JacketHeated Vest

Wearable electric gear (worn in the chest armor slot). Wearing it is the switch: it runs automatically only while it has charge and the weather calls for it. The Fan Jacket blows air on hot-day afternoons to cool you (drying sweat = evaporative cooling); the Heated Vest glows red on cold-day nights to warm you (making heat with power). While running, you don't get sluggish even outside. Both hold the same full charge, but the jacket lasts 4 times longer than the vest: making heat uses more power. New ones are empty, so charge them at an outlet. Away from home, you can also charge them from a Portable Battery. As armor, they give 5 armor points (between leather and iron armor).

See data for 2 kinds
Fan JacketFan Jacket
Worn on
chest, armor 5
You get it
When you take the quest “Beat the heat” (with the phone started)
Heated VestHeated Vest
Worn on
chest, armor 5
You get it
When you take the quest “Beat the cold” (with the phone started)

Portable Battery and Battery Charger

2 kinds
Portable BatteryBattery Charger

A battery for charging your jacket or vest away from home. The Portable Battery holds enough power to fill a jacket or vest twice (new ones are empty). Wear the jacket or vest, hold the battery and use it (right-click): it moves power into the garment until the garment is full (or the battery is empty). The amount is shown in % (the four marks on the item picture also turn green as it fills). Charge the battery on a Battery Charger at home: connect the charger to an outlet with a power cord, then right-click it while holding the battery to set the battery on it. It fills from empty in about 60 seconds (a sound plays when it is full). The marks on the charger light up one by one as it fills; the next mark blinks while charging, and they turn green when full. Right-click with an empty hand to take the battery back. It uses 200W only while charging and does not charge during a power outage. If you break the charger, the battery drops with the power it had.

See data for 2 kinds
Portable BatteryPortable Battery
Where to buy
Electronics Dealer 4,000 yen
Sells for
1,200 yen (Trader, Electronics Dealer)
Battery ChargerBattery Charger
Where to buy
Electronics Dealer 2,500 yen
Sells for
750 yen (Trader, Electronics Dealer)
Power use
200W (all the time)

Display Stand and Display Shelf

2 kinds
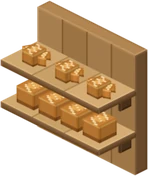
Display StandDisplay Shelf

A stand and a shelf for displaying things (sold only by the Trader). Right-click with an item to display one (the shelf has six spots: left, middle and right on the upper and lower rows, wherever you click). Right-click a displayed item to take it back (its name, enchantments and durability are kept). Breaking the stand or shelf drops everything on it. Sneak and right-click to place a block normally.

See data for 2 kinds
Display StandDisplay Stand
Where to buy
Trader 8,000 yen
Sells for
2,400 yen (Trader)
Display ShelfDisplay Shelf
Where to buy
Trader 25,000 yen
Sells for
7,500 yen (Trader)

The Baker's breads (Sweet Bun, Bean Paste Bun, Croissant)

3 kinds
Sweet BunBean Paste BunCroissant

Breads sold only by the Baker. Eating one fills you up and gives an effect for a while (shown on the phone if it is started, otherwise in chat): Sweet Bun = Speed for 60 seconds (walk a little faster), Bean Paste Bun = Jump Boost for 60 seconds (jump a little higher), Croissant = Slow Falling for 60 seconds (fall slowly).

See data for 3 kinds
Sweet BunSweet Bun
Where to buy
Baker 180 yen
Sells for
54 yen (Trader, Baker)
Food
Hunger +5
Bean Paste BunBean Paste Bun
Where to buy
Baker 160 yen
Sells for
48 yen (Trader, Baker)
Food
Hunger +5
CroissantCroissant
Where to buy
Baker 220 yen
Sells for
66 yen (Trader, Baker)
Food
Hunger +4

Station Bento

Station Bento

A bento sold only at the Station Kiosk. Eating it restores 8 hunger (4 shanks) and gives "Full": for one game day (about 20 minutes) you don't get hungry.

Where to buy
Station Kiosk 1,200 yen
Sells for
360 yen (Trader, Station Kiosk)
Food
Hunger +8

Vending machine drinks (Cold Tea, Sports Drink, Hot Cocoa)

3 kinds
Cold TeaSports DrinkHot Cocoa

Drinks bought from the vending machine (the Stationmaster's furniture). Cold Tea = Fire Resistance for 2 minutes and no sluggishness on hot days; Sports Drink = Speed for 3 minutes and no sluggishness on hot days; Hot Cocoa = Resistance for 2 minutes and no sluggishness on cold days.

See data for 3 kinds
Cold TeaCold Tea
Where to buy
Vending machine 160 yen
Food
Hunger +1
Sports DrinkSports Drink
Where to buy
Vending machine 180 yen
Food
Hunger +2
Hot CocoaHot Cocoa
Where to buy
Vending machine 160 yen
Food
Hunger +3

Soups (Vegetable Soup, Pumpkin Soup, Hearty Stew)

3 kinds
Vegetable SoupPumpkin SoupHearty Stew

Dishes that fill you up a lot (Vegetable Soup and Pumpkin Soup = 8, Hearty Stew = 10). The bowl is left after eating. In this version there is no recipe and no shop for them (take them from the Creative inventory). The microwave's kitchen screen from earlier versions is gone.

See data for 3 kinds
Vegetable SoupVegetable Soup
Food
Hunger +8 (leaves a bowl)
Pumpkin SoupPumpkin Soup
Food
Hunger +8 (leaves a bowl)
Hearty StewHearty Stew
Food
Hunger +10 (leaves a bowl)

Washed armor (with energy emblems, 28 kinds)

28 kinds
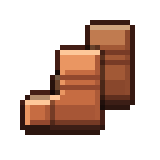
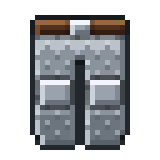
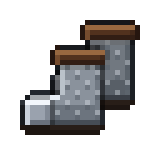
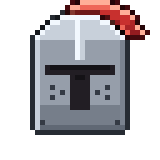
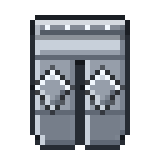
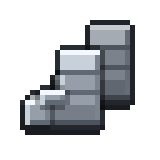
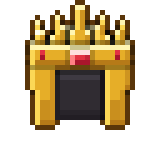
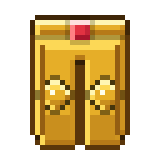
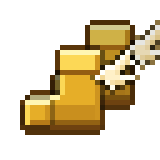
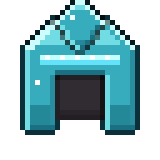
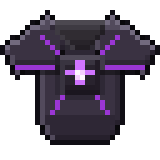
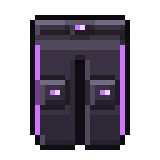
Wind Flight CapWind Flight JacketWind Flight PantsWind Flight BootsLightning Coil HelmetLightning Coil ArmorLightning Coil Leg GuardsLightning Coil BootsWater Chain HoodWater Chain ShirtWater Chain Leg GuardsWater Chain BootsFlame Knight HelmetFlame Knight ArmorFlame Knight Leg GuardsFlame Knight BootsSun CrownSun ArmorSun Leg GuardsSun Winged BootsAtom Crystal HelmetAtom Crystal ArmorAtom Crystal Leg GuardsAtom Crystal BootsFusion Horned HelmetFusion ArmorFusion Leg GuardsFusion Boots

Armor washed in the washing machine (four pieces for the helmet, chestplate, leggings and boots x 7 materials = 28 kinds). Each material gets an energy emblem on the chest, and its shape and name change too: leather is wind (Wind Flight Cap and more), copper is electricity (Lightning Coil Armor and more), chainmail is water (Water Chain Shirt and more), iron is fire (Flame Knight Helmet and more), gold is the sun (Sun Crown and more), diamond is the atom (Atom Crystal Armor and more), and netherite is fusion (Fusion Horned Helmet and more). Protection is the same as the original, and all of them can be worn. The emblems glow in the dark, and on gold, diamond and netherite the gems and lines glow too. The item pictures sparkle (the enchantment glint). Only undamaged (new) armor can be washed. Washing removes durability wear and enchantments.

See data for 28 kinds
Wind Flight CapWind Flight Cap
Worn on
head, armor 1
Wind Flight JacketWind Flight Jacket
Worn on
chest, armor 3
Wind Flight PantsWind Flight Pants
Worn on
legs, armor 2
Wind Flight BootsWind Flight Boots
Worn on
feet, armor 1
Lightning Coil HelmetLightning Coil Helmet
Worn on
head, armor 2
Lightning Coil ArmorLightning Coil Armor
Worn on
chest, armor 4
Lightning Coil Leg GuardsLightning Coil Leg Guards
Worn on
legs, armor 3
Lightning Coil BootsLightning Coil Boots
Worn on
feet, armor 1
Water Chain HoodWater Chain Hood
Worn on
head, armor 2
Water Chain ShirtWater Chain Shirt
Worn on
chest, armor 5
Water Chain Leg GuardsWater Chain Leg Guards
Worn on
legs, armor 4
Water Chain BootsWater Chain Boots
Worn on
feet, armor 1
Flame Knight HelmetFlame Knight Helmet
Worn on
head, armor 2
Flame Knight ArmorFlame Knight Armor
Worn on
chest, armor 6
Flame Knight Leg GuardsFlame Knight Leg Guards
Worn on
legs, armor 5
Flame Knight BootsFlame Knight Boots
Worn on
feet, armor 2
Sun CrownSun Crown
Worn on
head, armor 2
Sun ArmorSun Armor
Worn on
chest, armor 5
Sun Leg GuardsSun Leg Guards
Worn on
legs, armor 3
Sun Winged BootsSun Winged Boots
Worn on
feet, armor 1
Atom Crystal HelmetAtom Crystal Helmet
Worn on
head, armor 3
Atom Crystal ArmorAtom Crystal Armor
Worn on
chest, armor 8
Atom Crystal Leg GuardsAtom Crystal Leg Guards
Worn on
legs, armor 6
Atom Crystal BootsAtom Crystal Boots
Worn on
feet, armor 3
Fusion Horned HelmetFusion Horned Helmet
Worn on
head, armor 3
Fusion ArmorFusion Armor
Worn on
chest, armor 8
Fusion Leg GuardsFusion Leg Guards
Worn on
legs, armor 6
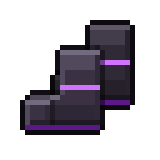
Fusion BootsFusion Boots
Worn on
feet, armor 3
FOLDER4

Town Residents

17 resident shop builders · 17 kinds

Resident shop builders (17)

17 kinds
Power Company BuilderElectronics Shop BuilderBakery BuilderPolice Box BuilderClinic BuilderStation Kiosk BuilderFactory BuilderWeather Station BuilderLaboratory BuilderElectrician's Shop BuilderTrading Company BuilderSemiconductor Factory BuilderSteel Mill BuilderSilicon Plant BuilderReprocessing Plant BuilderEquipment Maker BuilderObservatory Builder

Tools that build a resident's shop or factory in one go. When the town meets a condition, your phone gets a "Wants to move in!" call. Press that resident under Town on the home screen to get the builder; build it anywhere you like and the resident stands in front of the shop. Shops run on power from the breaker panel at the back (while there is no power they are Closed: the sign light goes out, and the resident looks troubled when you talk). The builder is used up and comes back with Builder Undo (so you can rebuild). The table below lists each resident, the power their shop uses, and its opening hours (game time).

Power Company (Power Company)Power 500W, all day
Wants a town with its first generator
Electronics Dealer (Electronics Shop)Power 400W, 9:00 to 18:00
Wants homes with power for half a day straight
Baker (Bakery)Power 800W, 4:00 to 7:00
Wants homes with enough power before dawn
Police Officer (Police Box)Power 200W, 19:00 to 5:00
Wants a town whose streets stay lit all night
Doctor (Clinic)Power 200W, all day
Wants no blackouts all day, plus a battery (after 3 residents)
Stationmaster (Station Kiosk)Power 400W, 16:00 to 21:00
Wants trains running all day, nonstop (after 3 residents)
Factory Manager (Factory)Power 2kW, 9:00 to 17:00
Wants lots of daytime power, nonstop (after 3 residents)
Weather Forecaster (Weather Station)Power 200W, 6:00 to 8:00
Wants solar and wind power on the same day (after 3 residents)
Professor (Lab)Power 600W, 10:00 to 16:00
Wants a lively town with 5 residents
Electrician (Electrician's Shop)Power 200W, 8:00 to 17:00
Wants a home with a tripping breaker (after 3 residents)
Trader (Trading Company)Power 200W, 9:00 to 17:00
Wants to sell imports where homes have power (after 3 residents)
Chipmaker (Chip Factory)Power 40kW, all day
Wants materials and power that never stops (after 6 residents)
Steelmaker (Electric Furnace Factory)Power 6kW, all day
Wants lots of spare power, like daytime solar (after 6 residents)
Silicon Maker (Silicon Factory)Power 10kW, all day
Wants a chip factory and lots of spare power (after 6 residents)
Reprocessor (Reprocessing Plant)Power 30kW, all day
Wants used fuel from a running reactor (after 6 residents)
Machine Maker (Machine Maker)Power 300W, 9:00 to 17:00
Wants to bring machines to a factory town (after 6 residents)
Astronomer (Observatory)Power 100W, 21:00 to 24:00
Wants a clear night sky, away from lights
See data for 17 kinds
Power Company BuilderPower Company Builder
Electronics Shop BuilderElectronics Shop Builder
Bakery BuilderBakery Builder
Police Box BuilderPolice Box Builder
Clinic BuilderClinic Builder
Station Kiosk BuilderStation Kiosk Builder
Factory BuilderFactory Builder
Weather Station BuilderWeather Station Builder
Laboratory BuilderLaboratory Builder
Electrician's Shop BuilderElectrician's Shop Builder
Trading Company BuilderTrading Company Builder
Semiconductor Factory BuilderSemiconductor Factory Builder
Steel Mill BuilderSteel Mill Builder
Silicon Plant BuilderSilicon Plant Builder
Reprocessing Plant BuilderReprocessing Plant Builder
Equipment Maker BuilderEquipment Maker Builder
Observatory BuilderObservatory Builder
FOLDER5

Shop Furniture

Shop furniture, factory equipment, fab machines · 144 kinds

The Power Company's dispatch center

2 kinds
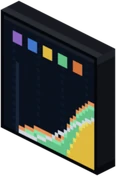
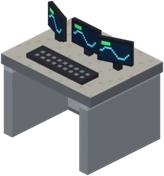
Dispatch Center Display PanelDispatch Console Desk

Furniture for the room inside the Power Company's building that watches over the grid. The display panel (a big glowing screen) opens the same screen as the Town Power Monitor when right-clicked. Talk to the Power Company to choose: a power-selling contract, a meter for a power plant (an electricity meter placed partway along a wire; the 30,000 yen installation fee is paid later out of your sales), the Power Sales Report, the dispatch center screen, and selling to cities outside town. The Power Company doesn't sell generators (generators come from the Electronics Dealer and the Machine Maker).

See data for 2 kinds
Dispatch Center Display PanelDispatch Center Display Panel
Light level
7
Dispatch Console DeskDispatch Console Desk
Light level
3

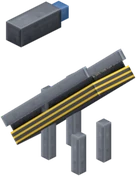
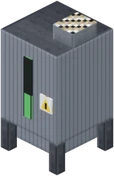
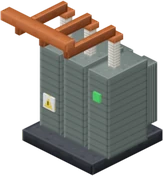
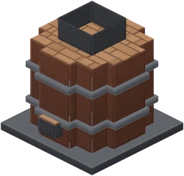
The outer substation (main transformer, gas circuit breaker, underground line termination, control house)

4 kinds
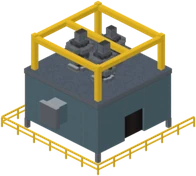
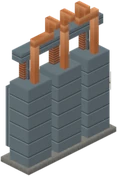
Main TransformerGas Circuit BreakerUnderground Line TerminationSubstation Control House

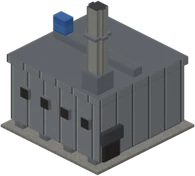
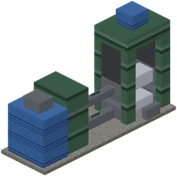
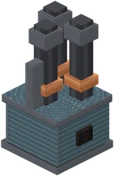
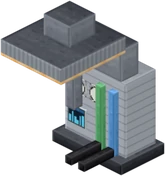
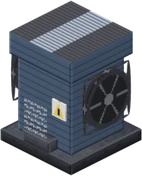
Substation equipment that sends the town's power to cities outside town. When the Power Company's building is built, it is built automatically on the edge of town (in an open spot 36 to 60 blocks behind or beside the building; it belongs to the town, so Builder Undo doesn't remove it). It raises the town's power (6,600 V) to 66,000 V and sends it to the outside city through underground cables. Each piece of equipment is explained below (the text shown when you right-click it).

See data for 4 kinds
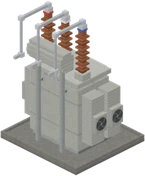
Main TransformerMain Transformer
About it
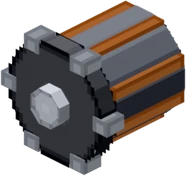
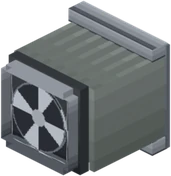
Main Transformer: Raises the town's power (6,600V) to the voltage for sending to cities outside (66,000V). It's cooled inside with insulating oil. The radiators and fans on the side cool the oil. The sideways tank on top (the conservator) holds oil that expanded as it warmed
Size
Main Transformer (3 wide, 3 deep, 4 tall)
Gas Circuit BreakerGas Circuit Breaker
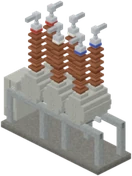
About it
Gas Circuit Breaker: In an accident, it cuts a huge current in an instant. The spark (arc) when it cuts is put out by SF6 gas in the tank. Three tanks = three phases (the insulator tops are red, white, and blue)
Size
Gas Circuit Breaker (3 wide, 1 deep, 3 tall)
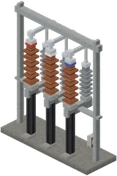
Underground Line TerminationUnderground Line Termination
About it
Underground Cable Lead-in Frame: Power goes to cities outside through underground cable. Brown insulators = the end of the underground cable; gray = lightning arresters that protect the machines from lightning
Size
Underground Cable Lead-in Frame (3 wide, 1 deep, 4 tall)
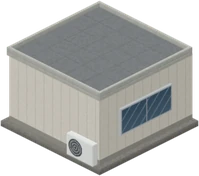
Substation Control HouseSubstation Control House
About it
Substation Control House: Watches over the substation's machines and connects to the faraway dispatch center. It usually runs with nobody there (an unmanned substation)
Size
Control House (3 wide, 3 deep, 2 tall)

The Electronics Dealer's furniture

4 kinds
Appliance Display ShelfElectronics Store RegisterAppliance Delivery BoxesElectric Fan

Furniture for the Electronics Dealer's shop. Right-click the appliance display shelf to compare each appliance's power use. The electric fan is an appliance that runs on power (40 W; right-click to switch it; connect it to an outlet with a power cord). Furniture comes from residents' requests and quest rewards, and once you have got a piece, you can buy it from the Items Book in the phone's Book (prices below).

See data for 4 kinds
Appliance Display ShelfAppliance Display Shelf
Furniture
Electronics Dealer's furniture; Items Book 50,000 yen
Right-click
Right-click to compare each appliance's power
Electronics Store RegisterElectronics Store Register
Furniture
Electronics Dealer's furniture; Items Book 150,000 yen
Appliance Delivery BoxesAppliance Delivery Boxes
Furniture
Electronics Dealer's furniture; Items Book 15,000 yen
Electric FanElectric Fan
Where to buy
Electronics Dealer 5,000 yen
Furniture
Electronics Dealer's furniture; Items Book 5,000 yen
Right-click
An appliance that runs on power (plug it into an outlet)
Sells for
1,500 yen (Trader, Electronics Dealer)
Power use
40W (while switched on)

The Baker's furniture

7 kinds
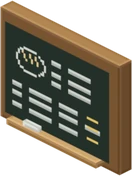
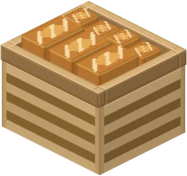
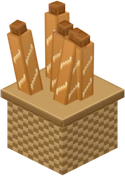
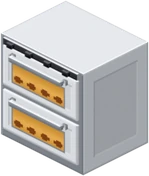
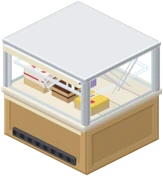
Cash RegisterChalkboard MenuBread Crate StandBaguette BasketBakery OvenGlass ShowcaseBread Shelf

Furniture for the Baker's shop. The bakery oven (400 W; right-click to switch it) and the glass showcase (160 W all the time) are appliances that run on power: connect them to an outlet with a power cord. The Baker is open only in the early morning (4:00 to 7:00).

See data for 7 kinds
Cash RegisterCash Register
Furniture
Baker's furniture; Items Book 40,000 yen
Chalkboard MenuChalkboard Menu
Furniture
Baker's furniture; Items Book 10,000 yen
Bread Crate StandBread Crate Stand
Furniture
Baker's furniture; Items Book 40,000 yen
Baguette BasketBaguette Basket
Furniture
Baker's furniture; Items Book 3,000 yen
Bakery OvenBakery Oven
Furniture
Baker's furniture; Items Book 1,500,000 yen
Right-click
Runs on power (plug it into an outlet)
Power use
400W (while switched on)
Glass ShowcaseGlass Showcase
Furniture
Baker's furniture; Items Book 300,000 yen
Right-click
Runs on power (plug it into an outlet)
Power use
160W (all the time)
Bread ShelfBread Shelf
Furniture
Baker's furniture; Items Book 50,000 yen

The Police Officer's furniture

4 kinds
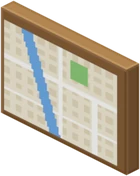
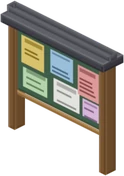
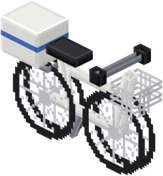
Town Map BoardPolice Box DeskNotice BoardWhite Bicycle

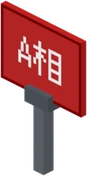
Furniture for the police box. Right-click the town map board to learn where the shops in town are (direction and distance). The Police Officer comes to a town where at least 6 street lights stay lit along the roads at night.

See data for 4 kinds
Town Map BoardTown Map Board
Furniture
Police Officer's furniture; Items Book 30,000 yen
Right-click
Right-click for shop locations (direction and distance)
Police Box DeskPolice Box Desk
Furniture
Police Officer's furniture; Items Book 50,000 yen
Notice BoardNotice Board
Furniture
Police Officer's furniture; Items Book 30,000 yen
White BicycleWhite Bicycle
Furniture
Police Officer's furniture; Items Book 40,000 yen

The Doctor's furniture

4 kinds
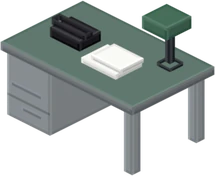
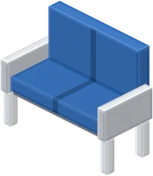
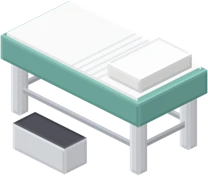
Medicine ShelfReception CounterWaiting BenchExamination Bed

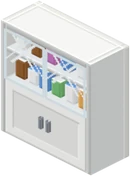
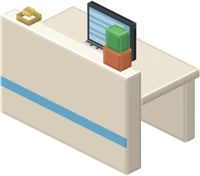
Furniture for the clinic. Right-click the medicine shelf for a talk about hospitals and power (some medicines and vaccines must be kept cold; a blackout stops refrigerators and medical machines; that's why hospitals have backup power), plus whether the clinic has power right now and how many batteries the town has.

See data for 4 kinds
Medicine ShelfMedicine Shelf
Furniture
Doctor's furniture; Items Book 80,000 yen
Right-click
Right-click for a talk about hospitals and power
Reception CounterReception Counter
Furniture
Doctor's furniture; Items Book 150,000 yen
Waiting BenchWaiting Bench
Furniture
Doctor's furniture; Items Book 50,000 yen
Examination BedExamination Bed
Furniture
Doctor's furniture; Items Book 100,000 yen

The Stationmaster's furniture

7 kinds
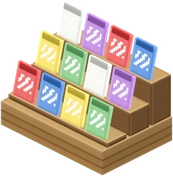
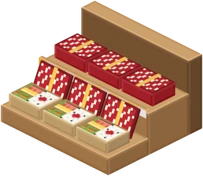
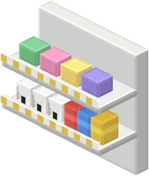
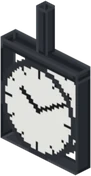
Kiosk RegisterMagazine RackStation Bento StandSnack ShelfVending MachineDrink CoolerStation Clock

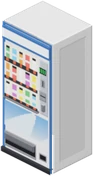
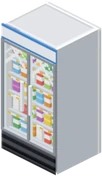
Furniture for the Station Kiosk. Right-click the vending machine (200 W all the time) to buy drinks (Cold Tea, Sports Drink, Hot Cocoa). The drink cooler (120 W all the time) runs on power too. Right-click the station clock for the departure chime and the town's time.

See data for 7 kinds
Kiosk RegisterKiosk Register
Furniture
Stationmaster's furniture; Items Book 150,000 yen
Magazine RackMagazine Rack
Furniture
Stationmaster's furniture; Items Book 20,000 yen
Station Bento StandStation Bento Stand
Furniture
Stationmaster's furniture; Items Book 40,000 yen
Snack ShelfSnack Shelf
Furniture
Stationmaster's furniture; Items Book 40,000 yen
Vending MachineVending Machine
Furniture
Stationmaster's furniture; Items Book 1,000,000 yen
Right-click
Runs on power (plug it into an outlet). Right-click to buy a drink
Power use
200W (all the time)
Drink CoolerDrink Cooler
Furniture
Stationmaster's furniture; Items Book 250,000 yen
Right-click
Runs on power (plug it into an outlet)
Power use
120W (all the time)
Station ClockStation Clock
Furniture
Stationmaster's furniture; Items Book 150,000 yen
Right-click
Right-click for the departure chime and the town time

The Factory Manager's furniture

4 kinds
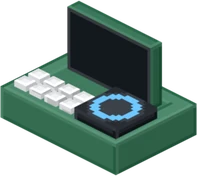
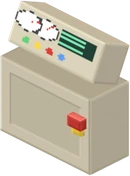
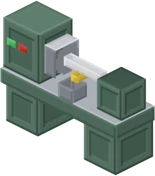
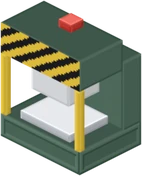
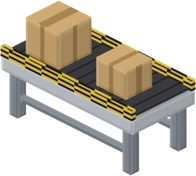
Operation PanelLathePress MachineConveyor

Furniture for the factory. Right-click the control panel to run the nearby lathe, press machine and conveyor for 10 seconds. The Factory Manager comes to a town that uses 10 homes' worth of power through the day without stopping.

See data for 4 kinds
Operation PanelOperation Panel
Furniture
Factory Manager's furniture; Items Book 300,000 yen
Right-click
Right-click to run nearby factory machines for 10 seconds
LatheLathe
Furniture
Factory Manager's furniture; Items Book 900,000 yen
Press MachinePress Machine
Furniture
Factory Manager's furniture; Items Book 1,000,000 yen
ConveyorConveyor
Furniture
Factory Manager's furniture; Items Book 300,000 yen

The Weather Forecaster's furniture

4 kinds
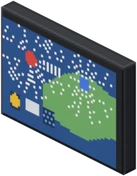
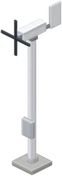
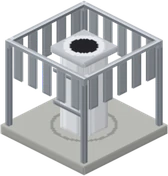
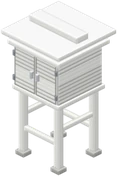
Weather Map ScreenAnemometerRain GaugeInstrument Shelter

Furniture for the weather station. Right-click the weather map screen or the anemometer to learn what the sky is doing now and what that means for solar and wind power. The instrument shelter and the rain gauge are decorations.

See data for 4 kinds
Weather Map ScreenWeather Map Screen
Furniture
Weather Forecaster's furniture; Items Book 100,000 yen
Right-click
Right-click for the current sky and solar and wind power
AnemometerAnemometer
Furniture
Weather Forecaster's furniture; Items Book 150,000 yen
Right-click
Right-click for the current sky and solar and wind power
Rain GaugeRain Gauge
Furniture
Weather Forecaster's furniture; Items Book 100,000 yen
Instrument ShelterInstrument Shelter
Furniture
Weather Forecaster's furniture; Items Book 150,000 yen

The Professor's furniture

4 kinds
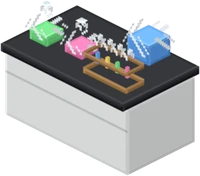
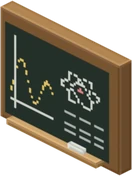
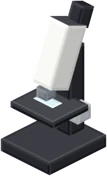
Lab BenchResearch ChalkboardMicroscopePower Model

Furniture for the lab. Right-click the lab bench for electricity experiments (electrolysis, a lemon battery and an electromagnet, in order). Right-click the microscope to look through it (3 slides). The Professor comes when 5 residents have arrived.

See data for 4 kinds
Lab BenchLab Bench
Furniture
Professor's furniture; Items Book 300,000 yen
Right-click
Right-click for electricity experiments (3 in turn)
Research ChalkboardResearch Chalkboard
Furniture
Professor's furniture; Items Book 50,000 yen
MicroscopeMicroscope
Furniture
Professor's furniture; Items Book 50,000 yen
Right-click
Right-click to look (3 slides)
Power ModelPower Model
Furniture
Professor's furniture; Items Book 20,000 yen

The Electrician's furniture

4 kinds
Electrician's DeskWork Schedule BoardWiring Supplies ShelfTool Battery Charger

Furniture for the Electrician's shop. The tool battery charger is an appliance that uses 60 W all the time (connect it to an outlet with a power cord). You can ask the Electrician to change a home's contract (amperage) and to do wiring work (widening a breaker panel's range).

See data for 4 kinds
Electrician's DeskElectrician's Desk
Furniture
Electrician's furniture; Items Book 50,000 yen
Work Schedule BoardWork Schedule Board
Furniture
Electrician's furniture; Items Book 20,000 yen
Wiring Supplies ShelfWiring Supplies Shelf
Furniture
Electrician's furniture; Items Book 20,000 yen
Tool Battery ChargerTool Battery Charger
Furniture
Electrician's furniture; Items Book 10,000 yen
Power use
60W (all the time)

The Astronomer's furniture

2 kinds
TelescopeStar Chart

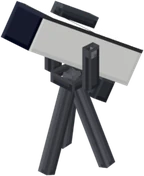
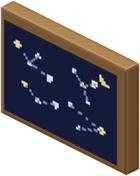
Furniture for the observatory. Right-click the telescope to look through it (the starry sky and the moon on a clear night). Right-click the star chart to learn how to find stars. The Astronomer comes to the town of someone who looks up at the sky on a clear night in a place with no lights (a hidden resident).

See data for 2 kinds
TelescopeTelescope
Furniture
Astronomer's furniture; Items Book 80,000 yen
Right-click
Right-click to look (stars and the moon on clear nights)
Star ChartStar Chart
Furniture
Astronomer's furniture; Items Book 2,000 yen
Right-click
Right-click for how to find stars

Shop lights (Pendant Light, Police Box Red Lamp)

2 kinds
Pendant LightPolice Box Red Lamp

Lights for shop buildings. The pendant light lights up when connected to an outlet with a power cord (like an LED). The police box red lamp is a decoration outside the police box (it is lit while the shop has power).

See data for 2 kinds
Pendant LightPendant Light
Police Box Red LampPolice Box Red Lamp

Chip Making Machine

Chip Making Machine

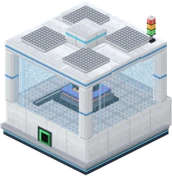
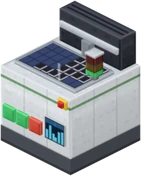
A fab machine that becomes 3 x 3 blocks and 3 blocks tall when placed (breaking any of its blocks turns it back into an item and drops the materials and products inside). The power inlet is at the bottom middle of the back: connect a wire there (40 kW). Right-click to open the 3 x 3 materials screen; Run processes once, and Auto processes as many times as the loaded materials allow (every one of the 9 slots needs materials, as with a crafting table). Through the glass you can watch all 19 steps, with the wafer changing at each step. 1 Silicon Wafer, 2 Copper Ingots, 8 Gold Nuggets and 2 Resin make 8 IC Chips. Semiconductors need power that never stops: if the stored power runs out partway, that run is ruined. You get it as the Chipmaker's furniture, and the Machine Maker sells it too.

Where to buy
Machine Maker 3,000,000 yen
Furniture
Chipmaker's furniture; Items Book 3,000,000 yen
Right-click
When placed, it becomes a 3x3 machine, 3 blocks tall. Connect a wire to the bottom middle of the back (the inlet), right-click to put materials in the 9 slots, and press "Run" (once) or "Auto" (as long as materials last). Watch the 19 steps through the glass
Sells for
900,000 yen (Trader, Machine Maker)

Semiconductor factory equipment (19 machines)

19 kinds
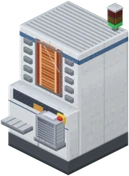
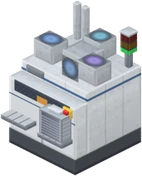
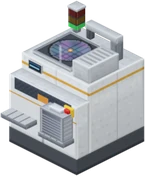
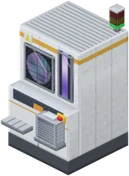
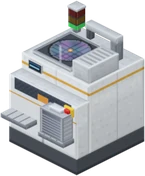
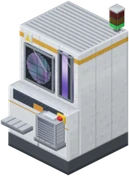
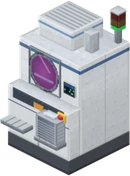
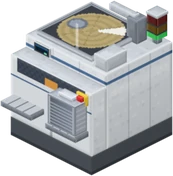
Wafer StockerWet Cleaning StationOxidation FurnaceCVDResist CoaterLithography ScannerDeveloperPlasma EtcherIon ImplanterMetal SputterResist Coater 2Lithography Scanner 2Metal EtcherCMP PolisherWafer ProberDicing SawDie / Wire BonderMolding PressFinal Tester

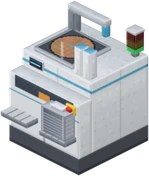
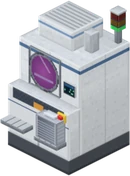
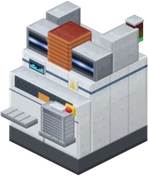
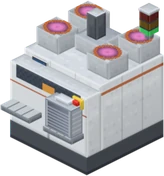
The 19 machines lined up in the Chipmaker's factory (built with the Semiconductor Factory Builder). One machine per step: an overhead vehicle carries the wafer box (a FOUP holding 25 wafers) through the steps in order and each machine runs (some steps come round twice: transistors on the first pass, wiring on the second). Talk to the Chipmaker and choose "Have chips made" (3,000 yen per Silicon Wafer, 8 chips per wafer; LED chips also need gallium) and the chips arrive in the barrel to the right of the entrance. Even without customers, a lot for visitors keeps flowing through. In a hand-built factory, line these 19 machines up around the Semiconductor Line Console.

See data for 19 kinds
Wafer StockerWafer Stocker
Sells for
39,473 yen (Trader, Machine Maker)
About it
Wafer Stocker: A shelf that holds wafer boxes (FOUPs). One box holds 25 wafers. Vehicles running on ceiling rails carry the boxes from machine to machine
Wet Cleaning StationWet Cleaning Station
Sells for
39,473 yen (Trader, Machine Maker)
About it
Wet Cleaning Station: Chemicals and pure water remove invisible dirt. One speck of dust can ruin a circuit, so it's washed many times
Oxidation FurnaceOxidation Furnace
Sells for
39,473 yen (Trader, Machine Maker)
About it
Oxidation Furnace: A furnace at about 1,000 degrees makes a thin glass film (oxide film) on the wafer surface. Many wafers are baked at once in a quartz tube
CVDCVD
Sells for
39,473 yen (Trader, Machine Maker)
About it
CVD: Gas or plasma stacks thin films. The film is thinner than a thousandth of a hair
Resist CoaterResist Coater
Sells for
39,473 yen (Trader, Machine Maker)
About it
Resist Coater: A chemical that changes with light (resist) is spread thin by spinning the wafer. This room has yellow lighting (so light doesn't change the chemical)
Lithography ScannerLithography Scanner
Sells for
39,473 yen (Trader, Machine Maker)
About it
Lithography Scanner: Light prints the shape of the circuit master (mask) onto the wafer. It prints one spot at a time, shifting dozens of times. The most expensive machine in the factory (the main body is the big box in back)
DeveloperDeveloper
Sells for
39,473 yen (Trader, Machine Maker)
About it
Developer: Chemicals wash away the resist where light hit, revealing the circuit shape. The same idea as developing photos
Plasma EtcherPlasma Etcher
Sells for
39,473 yen (Trader, Machine Maker)
About it
Plasma Etcher: Plasma (glowing gas) cuts away unneeded film. Only the parts covered by resist remain
Ion ImplanterIon Implanter
Sells for
39,473 yen (Trader, Machine Maker)
About it
Ion Implanter: Accelerated ions are shot in to change how electricity flows. This is where transistors (electric switches) are made
Metal SputterMetal Sputter
Sells for
39,473 yen (Trader, Machine Maker)
About it
Metal Sputter: Argon ions hit a copper plate, and the copper knocked off stacks up into a metal film for wiring. The pink light in the chamber is argon plasma
Resist Coater 2Resist Coater 2
Sells for
39,473 yen (Trader, Machine Maker)
About it
Resist Coater 2: Resist is coated again to make the wiring shape
Lithography Scanner 2Lithography Scanner 2
Sells for
39,473 yen (Trader, Machine Maker)
About it
Lithography Scanner 2: Light prints the wiring shape onto the wafer. Layer after layer of wiring is stacked on top of the transistors
Metal EtcherMetal Etcher
Sells for
39,473 yen (Trader, Machine Maker)
About it
Metal Etcher: The metal film is cut into the wiring shape
CMP PolisherCMP Polisher
Sells for
39,473 yen (Trader, Machine Maker)
About it
CMP Polisher: A spinning pad and chemicals polish the surface flat as a mirror. If it isn't flat, the circuits in upper layers would be off
Wafer ProberWafer Prober
Sells for
39,473 yen (Trader, Machine Maker)
About it
Wafer Prober: Needles test each chip one by one. On the screen's map, green is good and red is bad
Dicing SawDicing Saw
Sells for
39,473 yen (Trader, Machine Maker)
About it
Dicing Saw: A diamond blade, cooled with water, cuts the wafer into chips. From here on is the back end (turning chips into products)
Die / Wire BonderDie / Wire Bonder
Sells for
39,473 yen (Trader, Machine Maker)
About it
Die / Wire Bonder: The chip goes on a base (lead frame) and is linked with gold wire thinner than a hair
Molding PressMolding Press
Sells for
39,473 yen (Trader, Machine Maker)
About it
Molding Press: Black resin wraps the chip to protect it. That's where the familiar black IC shape comes from
Final TesterFinal Tester
Sells for
39,473 yen (Trader, Machine Maker)
About it
Final Tester: The finished chips are tested, and only good ones ship. Sometimes they're tested to see if they work in hot and cold places

Semiconductor factory building parts (cleanroom ceiling, yellow-light ceiling, overhead rail, air shower, service chase, line console)

6 kinds
Cleanroom Ceiling (FFU)Yellow-light CeilingOverhead RailAir ShowerService ChaseSemiconductor Line Console

The cleanroom ceiling (FFU) glows only while the factory has power (the yellow-light ceiling is for the resist room, where light must not change the chemicals). Vehicles run along the overhead rail, and the air shower blows dust off people coming in. The Semiconductor Line Console is the head of a hand-built factory (300,000 yen from the Machine Maker; 2,500,000 yen for the full set of equipment): place it, line the machines up around it (±24 sideways, ±4 up and down) and right-click to find and link the machines; it then runs on the same screen as the fab machine. Connect a wire to the console for power.

See data for 6 kinds
Cleanroom Ceiling (FFU)Cleanroom Ceiling (FFU)
Yellow-light CeilingYellow-light Ceiling
Overhead RailOverhead Rail
Air ShowerAir Shower
Service ChaseService Chase
Semiconductor Line ConsoleSemiconductor Line Console
Where to buy
Machine Maker 300,000 yen (full set of equipment 2,500,000 yen)
Sells for
90,000 yen (Trader, Machine Maker)

Electric Steelmaking Machine

Electric Steelmaking Machine

A fab machine that becomes 3 x 3 blocks and 3 blocks tall when placed (120 kW). From 8 Scrap Iron (iron tools, armor, rails, buckets, iron bars and so on also go in as scrap) and 1 Graphite, it makes 7 Iron Ingots in 9 steps (scrap, charging, melting, tapping, ladle refining, continuous casting, cutting, cooling bed, rolling). When power runs short it stops and waits (and continues when power comes back). You get it as the Steelmaker's furniture, and the Machine Maker sells it too.

Where to buy
Machine Maker 2,000,000 yen
Furniture
Steelmaker's furniture; Items Book 2,000,000 yen
Right-click
When placed, it becomes a 3x3 machine, 3 blocks tall. Connect a wire to the inlet, put scrap iron (iron tools and buckets too) and graphite in the 9 slots, and press "Run". In 9 steps it becomes iron ingots
Sells for
600,000 yen (Trader, Machine Maker)

Steel mill equipment and building

20 kinds
Scrap PileDrop-out BoxElectric Arc FurnaceEAF Electrodes & Transformer VaultTapping Ladle CarLadle Furnace Car & TransformerLadle Furnace Roof & ElectrodesContinuous CasterCaster Deck, Tundish & Ladle TurretRoller TableTorch CutterCooling BedReheating FurnaceRolling Mill StandRebar BundlesBaghouse & StackOff-gas DuctDuct Support ColumnCrane RunwaySteelmaking Line Console

Equipment in the Steelmaker's steel mill (built with the Steel Mill Builder). An overhead crane (an electromagnet) carries scrap to the electric arc furnace, which melts it with the arcs of three graphite electrodes; it then flows through the ladle, the ladle furnace, the continuous caster, gas cutting, the cooling bed, the reheating furnace and the rolling mill to become rebar. Talk to the Steelmaker and choose "Bring scrap iron": 90% of the iron inside becomes Iron Ingots (100 yen each, up to 64 per visit). The electric arc furnace runs only while the town's generation exceeds what it uses (it never blacks out homes or shops: power whose timing can shift). The big machines are single blocks covering many spaces (sizes below). The Steel Mill Console is the head of a hand-built factory (300,000 yen from the Machine Maker; 1,500,000 yen for the full set of equipment).

See data for 20 kinds
Scrap PileScrap Pile
Sells for
64,285 yen (Trader, Machine Maker)
About it
Scrap Pile: Used iron (building steel frames, cars, appliances, cans, etc.). The material for the electric furnace. About a quarter of Japan's steel is made by melting scrap iron with electricity
Drop-out BoxDrop-out Box
About it
Settling Chamber: A box that drops big dust from the hot exhaust drawn through the fourth hole in the furnace roof. From here, a duct goes to the dust collector outside
Size
Settling Chamber (1 wide, 3 deep, 5 tall)
Electric Arc FurnaceElectric Arc Furnace
Sells for
64,285 yen (Trader, Machine Maker)
About it
Electric Arc Furnace: Lightning-like discharges (arcs) between 3 graphite electrodes and the scrap melt it. The furnace is about 5 m across. Melting 1 ton of steel uses about a month and a half of a home's power (about 400kWh)
Size
Electric Arc Furnace (3 wide, 5 deep, 4 tall)
EAF Electrodes & Transformer VaultEAF Electrodes & Transformer Vault
About it
Electric furnace electrodes and transformer room: The furnace transformer in the transformer room→the "delta connection" joining 3 copper conductors from the wall in a triangle (the three-phase knot)→black water-cooled cables→copper arms→graphite electrodes. Tens of thousands of amps flow, so the cables are cooled with water inside
Size
Electric Arc Furnace (3 wide, 5 deep, 4 tall)
Tapping Ladle CarTapping Ladle Car
About it
Tapping Cart: A cart carrying the ladle that catches molten steel from the electric furnace. The overhead crane carries the ladle to the next machine
Ladle Furnace Car & TransformerLadle Furnace Car & Transformer
Sells for
64,285 yen (Trader, Machine Maker)
About it
Ladle Furnace (LF): Keeps the steel in the ladle warm with thin electrodes while the composition (carbon, etc.) is adjusted. Power comes from the transformer beside it, the same way as the electric furnace
Size
Ladle Furnace (LF) (3 wide, 5 deep, 4 tall)
Ladle Furnace Roof & ElectrodesLadle Furnace Roof & Electrodes
About it
Ladle furnace roof and electrodes: A roof goes on the ladle and 3 electrodes come down to heat it
Size
Ladle Furnace (LF) (3 wide, 5 deep, 4 tall)
Continuous CasterContinuous Caster
Sells for
64,285 yen (Trader, Machine Maker)
About it
Continuous Caster: Cools and hardens molten steel in a copper mold, bending it like a bow into long billets, nonstop. Water is sprayed in the room below to cool it
Size
Continuous Caster (3 wide, 3 deep, 5 tall)
Caster Deck, Tundish & Ladle TurretCaster Deck, Tundish & Ladle Turret
About it
Continuous caster casting floor: The turret (rotating stand) that holds the ladle, and the tundish that holds steel and spreads it into the molds
Size
Continuous Caster (3 wide, 3 deep, 5 tall)
Roller TableRoller Table
About it
Roller Table: A row of spinning rollers carries the red billets
Torch CutterTorch Cutter
Sells for
64,285 yen (Trader, Machine Maker)
About it
Torch Cutter: Cuts the incoming billets to set lengths with a gas flame
Cooling BedCooling Bed
Sells for
64,285 yen (Trader, Machine Maker)
About it
Cooling Bed: Comb-shaped rails move the cut billets along little by little as they cool
Size
Cooling Bed (3 wide, 3 deep)
Reheating FurnaceReheating Furnace
About it
Reheating Furnace: Reheats the billets to a rolling temperature (about 1,100 degrees) with burner flames
Size
Reheating Furnace (3 wide, 3 deep, 4 tall)
Rolling Mill StandRolling Mill Stand
Sells for
64,285 yen (Trader, Machine Maker)
About it
Rolling Mill (stand): Passes red steel between upper and lower rolls to stretch it long and thin. The motor and gearbox behind turn the rolls
Size
Rolling Mill (1 wide, 3 deep, 2 tall)
Rebar BundlesRebar Bundles
About it
Rebar Bundles: The finished rebar. It goes inside the concrete of buildings and bridges
Baghouse & StackBaghouse & Stack
About it
Dust Collector (bag filter): Filters the dust out of the exhaust with cloth bags before the chimney. The collected dust (with zinc and more) becomes a resource again
Size
Dust Collector (3 wide, 3 deep, 10 tall (chimney))
Off-gas DuctOff-gas Duct
About it
Off-gas Duct: A pipe carrying the furnace exhaust from the settling chamber to the dust collector outside
Duct Support ColumnDuct Support Column
Crane RunwayCrane Runway
Steelmaking Line ConsoleSteelmaking Line Console
Where to buy
Machine Maker 300,000 yen (full set of equipment 1,500,000 yen)
Sells for
90,000 yen (Trader, Machine Maker)

Metallic Silicon Machine

Metallic Silicon Machine

A fab machine that becomes 3 x 3 blocks and 3 blocks tall when placed (120 kW). From 8 Silica (sand or nether quartz), 4 Charcoal (coal or charcoal) and 1 Graphite, it makes 4 Metallic Silicon in 9 steps (weighing, charging, reduction, tapping, ladle refining, casting, cooling, crushing, screening). When power runs short it stops and waits. You get it as the Silicon Maker's furniture, and the Machine Maker sells it too.

Where to buy
Machine Maker 2,000,000 yen
Furniture
Silicon Maker's furniture; Items Book 2,000,000 yen
Right-click
When placed, it becomes a 3x3 machine, 3 blocks tall. Connect a wire to the inlet, put silica (sand or nether quartz), charcoal, and graphite in the 9 slots, and press "Run". In 9 steps it becomes metallic silicon
Sells for
600,000 yen (Trader, Machine Maker)

Silicon plant equipment and building (pilot plant)

26 kinds
Quartz PileReductant PileWeigh HopperIncline ConveyorRaw Material BinFurnace TransformersSilicon FurnaceElectrodes & HoistLadle Refining StationCasting MoldJaw CrusherVibrating ScreenSilicon Big BagLadle Car RailOff-gas DuctBatching HoppersBucket Elevator & BeltDay BinSubmerged Arc FurnaceFurnace Hood & ElectrodesFurnace TransformersLadle Refining StationCasting MoldsJaw CrusherVibrating ScreenMetal Silicon Line Console

Equipment in the Silicon Maker's metallic silicon pilot plant (built with the Silicon Plant Builder). Silica and carbon are weighed and carried to the bins, the charging machine loads them into the furnace, and the furnace, with three electrodes buried in the raw materials, heats them to nearly 2000 degrees so the carbon takes the oxygen from the quartz (SiO2 + 2C -> Si + 2CO). Then tapping, ladle refining, molds, crushing and screening fill 1-ton bags. Talk to the Silicon Maker and choose "Bring materials" (2 silica + 1 carbon -> 1 Metallic Silicon, 300 yen each) to get metallic silicon. The furnace runs only while the town has at least 125 kW to spare; when power runs short it stops and waits, and when power comes back it reheats for 10 seconds before continuing. The silicon2 equipment is a new single large shape (sizes below). The Metal Silicon Plant Console is the head of a hand-built factory (300,000 yen; 1,500,000 yen for the full set of equipment).

See data for 26 kinds
Quartz PileQuartz Pile
About it
Quartz Pile: The material for silicon = white stone made of quartz (SiO2). Real factories use fist-sized stones (fine sand would block the gas in the furnace). Quartz is also what white sand is made of. This factory uses sand and nether quartz instead of silica
Reductant PileReductant Pile
About it
Reductant Pile: The carbon material = coal, charcoal, and wood chips. Carbon takes the oxygen from quartz. Wood chips keep gaps in the raw material so gas passes through easily
Weigh HopperWeigh Hopper
Sells for
56,250 yen (Trader, Machine Maker)
About it
Weigh Hopper: Silica and charcoal are weighed and mixed in set amounts. Too much or too little carbon and it won't become silicon well
Incline ConveyorIncline Conveyor
Sells for
56,250 yen (Trader, Machine Maker)
About it
Incline Conveyor: The mixed raw material is carried up to the platform above the furnace
Raw Material BinRaw Material Bin
About it
Raw Material Bin: Raw material collects on the platform above the furnace. The charging machine scoops from here
Furnace TransformersFurnace Transformers
Sells for
56,250 yen (Trader, Machine Maker)
About it
Furnace Transformers: Three of them make three-phase power and send a huge current to the 3 electrodes. A big factory's furnace has three 4,200kVA transformers (about 100 times this test furnace)
Silicon FurnaceSilicon Furnace
Sells for
56,250 yen (Trader, Machine Maker)
About it
Submerged Arc Furnace (furnace body): The electrodes are buried (submerged) in raw material, and arcs and electric heat bring it close to 2,000 degrees. The furnace body turns slowly. Molten silicon pours into a ladle from the front tap hole
Size
Metallic Silicon Furnace (3 tall)
Electrodes & HoistElectrodes & Hoist
About it
Electrodes & Hoist: The 3 electrodes wear down little by little, so they're slipped downward as they're used. Power flows through copper plates. A big factory's electrodes are about 1 meter thick
Size
Metallic Silicon Furnace (3 tall)
Ladle Refining StationLadle Refining Station
Sells for
56,250 yen (Trader, Machine Maker)
About it
Ladle Refining Station: Oxygen and air blown in from the bottom of the ladle remove impurities like calcium and aluminum as slag
Casting MoldCasting Mold
Sells for
56,250 yen (Trader, Machine Maker)
About it
Casting Mold: Molten silicon is poured in and cooled to harden. Hardened, it's a bluish silver. It looks like metal, but it's a metalloid, between metals and nonmetals
Jaw CrusherJaw Crusher
Sells for
56,250 yen (Trader, Machine Maker)
About it
Jaw Crusher: Moving jaws chew up the hardened silicon plates
Vibrating ScreenVibrating Screen
Sells for
56,250 yen (Trader, Machine Maker)
About it
Vibrating Screen: Sorts the crushed lumps by size (10 to 100 mm)
Silicon Big BagSilicon Big Bag
About it
Silicon Big Bag: The finished metallic silicon (about 99% pure). It becomes aluminum alloys, silicones (rubber and oil), and material for solar cells and chips
Ladle Car RailLadle Car Rail
Off-gas DuctOff-gas Duct
Batching HoppersBatching Hoppers
About it
Weighing Hoppers (2): Silica and charcoal are weighed in separate boxes, then put on the belt below and mixed. Weight is measured by the 4 scales (load cells) holding up each box
Size
Weigh Hopper (3 wide, 3 deep, 4 tall)
Bucket Elevator & BeltBucket Elevator & Belt
About it
Bucket Elevator and Horizontal Belt: Buckets in a vertical row lift the mixed raw material up to the furnace top, and the belt above carries it to the bin
Size
Bucket Elevator (3 wide, 1 deep, 5 tall)
Day BinDay Bin
About it
Raw Material Bin: Raw material collects at the height of the furnace top. The charging machine scoops it from the front opening (at charging-floor height)
Size
Raw Material Bin (1 wide, 3 deep, 5 tall)
Submerged Arc FurnaceSubmerged Arc Furnace
About it
Submerged Arc Furnace (furnace body and charging floor): 3 electrodes are buried (submerged) in raw material, and arcs and electric heat bring it close to 2,000 degrees. The furnace body turns slowly. Molten silicon pours into a ladle from the front tap hole and spout
Size
Metallic Silicon Furnace (5 wide, 5 deep, 7 tall)
Furnace Hood & ElectrodesFurnace Hood & Electrodes
About it
Furnace Hood and 3 Electrodes: Inside the water-cooled hood, carbon takes the oxygen from quartz and the carbon monoxide made burns. The graphite electrodes are slipped down as they wear. SiO2 + 2C → Si + 2CO
Size
Metallic Silicon Furnace (5 wide, 5 deep, 7 tall)
Furnace TransformersFurnace Transformers
About it
Furnace Transformers: Three of them make three-phase power, sending a huge current through thick copper conductors to the 3 electrodes. A big factory's furnace has three 4,200kVA transformers (about 100 times this test furnace)
Size
Furnace Transformer (1 wide, 3 deep, 4 tall)
Ladle Refining StationLadle Refining Station
About it
Ladle Refining Station: A lance blows oxygen (blue pipe) and air (green pipe) into the ladle to remove calcium, aluminum, and such as slag. The hood sucks up the fumes
Size
Ladle Refining Station (1 wide, 3 deep, 4 tall)
Casting MoldsCasting Molds
About it
Molds (3): Molten silicon is poured in and cooled to harden. Hardened, it's a bluish silver. It looks like metal, but it's a metalloid, between metals and nonmetals
Size
Casting Mold (3 wide, 1 deep)
Jaw CrusherJaw Crusher
About it
Jaw Crusher: Moving jaws chew up the hardened silicon plates. Heavy flywheels on both sides move the jaws
Size
Crusher (3 wide, 3 deep, 3 tall)
Vibrating ScreenVibrating Screen
About it
Vibrating Screen: A mesh shaken on springs sorts the crushed lumps by size (10 to 100 mm). Into the 1-ton bag in back
Size
Vibrating Screen (3 wide, 3 deep, 2 tall)
Metal Silicon Line ConsoleMetal Silicon Line Console
Where to buy
Machine Maker 300,000 yen (full set of equipment 1,500,000 yen)
Sells for
90,000 yen (Trader, Machine Maker)

Factory power (Intake Panel, Power Panel, Underfloor Power Line, Busway, Power Cable, Lighting Rail, Factory LED)

7 kinds
Intake Panel (Cubicle)Power PanelUnderfloor Power LineBuswayPower CableLighting RailFactory LED

Parts that carry power inside a factory. The Intake Panel (a cubicle, 2 blocks tall) is where power enters the factory; the Power Panel sends it to the machines through the Underfloor Power Line (a trench in the floor). Right-click the Intake Panel to see the incoming power (stepping 6,600 V high voltage down to the voltage the factory uses, the power in use, the contracted power); right-click the Power Panel to see each machine (running / waiting / no power line). When you rearrange a factory there are two ways to run power: [machines] hold a Power Cable and right-click the Busway (a thick square duct run along the ceiling and so on) to add a plug-in point, then right-click a machine to connect it with a thick cord. [lights] hold a Factory LED and right-click the Lighting Rail to add a light, and plug the rail into an outlet with one power cord (all the lights on the connected rail light up; 50 W each). Sold by the Machine Maker (16 Underfloor Power Lines 160 yen, 16 Busways 640 yen, 4 Power Cables 2,400 yen, 16 Lighting Rails 480 yen, 4 Factory LEDs 2,000 yen).

See data for 7 kinds
Intake Panel (Cubicle)Intake Panel (Cubicle)
Power PanelPower Panel
Underfloor Power LineUnderfloor Power Line
Where to buy
Machine Maker 160 yen (x16)
Sells for
3 yen (Trader, Machine Maker)
BuswayBusway
Where to buy
Machine Maker 640 yen (x16)
Sells for
12 yen (Trader, Machine Maker)
Power CablePower Cable
Where to buy
Machine Maker 2,400 yen (x4)
Sells for
180 yen (Trader, Machine Maker)
Lighting RailLighting Rail
Where to buy
Machine Maker 480 yen (x16)
Sells for
9 yen (Trader, Machine Maker)
Power use
50W (per light)
Factory LEDFactory LED
Where to buy
Machine Maker 2,000 yen (x4)
Sells for
150 yen (Trader, Machine Maker)

Nuclear Fuel Reprocessing Machine

Nuclear Fuel Reprocessing Machine

A fab machine that becomes 3 x 3 blocks and 3 blocks tall when placed (30 kW). From 5 Spent Fuel (still inside a Transport Cask is fine: it counts what is inside) and 4 Glass, it makes one each of MOX Powder, Uranium Oxide, a Vitrified Waste Canister and Hull Scrap in 7 steps (receiving and storage, shearing, dissolving, separation, purification, denitration, vitrification). The reward for the Reprocessor's request "Bring me fuel". The Machine Maker sells it too.

Where to buy
Machine Maker 4,000,000 yen
Furniture
Reprocessor's furniture; Items Book 4,000,000 yen
Right-click
When placed, it becomes a 3x3 machine, 3 blocks tall. Connect a wire to the inlet, put 5 spent fuel (in the waste container is fine) and 4 glass in the 9 slots, and press "Run". In 7 steps it makes MOX powder, uranium oxide, vitrified waste, and metal scraps
Sells for
1,200,000 yen (Trader, Machine Maker)

The Reprocessor's plant (shear, dissolver, pulsed columns, denitration, glass melter, storage racks, signs, windows, set-down pad, hatches)

10 kinds
Transfer Crane Set-down PadShear Feed HatchFuel ShearRotary DissolverPulsed ColumnsDenitration UnitsGlass Melter & CanisterProduct Storage RackProcess SignLead Glass Window

The machines inside the thick concrete rooms (cells) of the Reprocessor's plant (built with the Reprocessing Plant Builder; 30 kW). Big machines are single blocks covering many spaces. Bring spent fuel to the Reprocessor (still in a Transport Cask is fine; 5 per batch) and an overhead crane carries the fuel while each machine runs in turn: shearing, dissolving, separation and purification, denitration and vitrification. The products (MOX Powder, Uranium Oxide, Vitrified Waste Canister, Hull Scrap) go into the shipping box (barrel) to the right of the entrance. Without power it stops and waits. You can see inside through the lead glass windows of the visitor corridor. The process signs on the back wall of the cells light up for the step that is running. Right-click a machine or a sign for an explanation of that step.

See data for 10 kinds
Transfer Crane Set-down PadTransfer Crane Set-down Pad
Shear Feed HatchShear Feed Hatch
Fuel ShearFuel Shear
About it
Shearing Machine: Fuel assemblies are fed sideways and cut into 3 to 4 cm by a hydraulic blade. The pieces drop from the opening below into the dissolver on the right. Through the viewing window on the front box, you can see the blade move up and down cutting the fuel
Size
Shearing Machine (1 wide, 3 deep, 3 tall)
Rotary DissolverRotary Dissolver
About it
Rotary Dissolver: In a round tank laid on its side, a wheel like a water wheel turns slowly. Pieces in the wheel's compartments are dipped in hot nitric acid to dissolve. The cladding that doesn't dissolve (hulls) goes out to the drum in back as metal scraps
Size
Dissolver (3 wide, 3 deep, 3 tall)
Pulsed ColumnsPulsed Columns
About it
Pulse Column: In thin towers, the liquid pulses up and down, mixing a water liquid and an oil liquid well to separate them. The front 2 = split uranium and plutonium from high-level liquid waste (separation); the back 2 = make them cleaner (purification). Colors in the windows: yellow = uranium, purple = plutonium, green = fission products (colored to be easy to see)
Size
Pulse Column (3 wide, 3 deep, 5 tall)
Denitration UnitsDenitration Units
About it
Denitration Units: Left tower = sprays the uranium liquid onto a hot powder bed to make uranium oxide powder (into the yellow container). Right furnace = heats the uranium and plutonium liquid with microwaves, like a microwave oven, to make MOX powder (into the orange-lidded can). MOX powder becomes the material for MOX fuel
Size
Denitration Tower (3 wide, 3 deep, 5 tall)
Glass Melter & CanisterGlass Melter & Canister
About it
Glass Melter: High-level liquid waste and glass material are melted at about 1,100 degrees by running power through electrodes on both sides. Poured into the stainless steel container (canister) below and hardened, it becomes vitrified waste. Vitrified waste cools for 30 to 50 years, then is buried deep underground (geological disposal)
Size
Glass Melter (3 wide, 3 deep, 4 tall)
Product Storage RackProduct Storage Rack
About it
Product Storage Rack: Where the products go. Orange lid = MOX powder can, yellow = uranium oxide container, stainless tube = vitrified waste
Size
Product Storage Rack (1 wide, 3 deep, 2 tall)
Process SignProcess Sign
Lead Glass WindowLead Glass Window
FOLDER6

Making Things

Materials, parts, machines, things mid-process · 67 kinds

Making machines (Silicon Arc Furnace, Refiner, Wafer Saw, Chip Factory)

4 kinds
Silicon Arc FurnaceRefinerWafer SawChip Factory

Four machines that turn materials into parts. Right-click to open the same 3 x 3 screen as a crafting table, where only that machine's recipes work. They need power (arc furnace 3 kW, refiner 2 kW, saw 0.5 kW, chip factory 0.8 kW): connect the green port on its back face to a generator with a wire (there are no ports on the front or sides, and it doesn't draw from a generator placed right next to it) and it stores enough power for one run (20 seconds' worth). It opens when both of these are true: (1) power is stored, and (2) the connected generators are producing at least the machine's power right now (a battery set to "Send" helps with up to 3 kW each). Then you can use it as many times as you like for 20 seconds. If not, chat tells you what is missing. Lamp colors: red = not charged yet, green = ready, bright window = running. The power used counts as the user's own consumption and is taken out of their power sales.

See data for 4 kinds
Silicon Arc FurnaceSilicon Arc Furnace
How to make
Crafting table: iron ingot x2 + copper wire x1 + bricks x5 + cauldron x1
Sells for
434 yen (Trader, Electronics Dealer)
In real life
A furnace that makes very high heat by firing sparks (arcs) between electrodes. It makes metallic silicon from quartz and carbon (different from the furnace that melts iron). It needs 3kW of power.
RefinerRefiner
How to make
Crafting table: iron ingot x5 + glass x1 + copper wire x2 + cauldron x1
Sells for
354 yen (Trader, Electronics Dealer)
In real life
A machine that purifies materials by heating them with electricity or by electrolysis. It needs 2kW of power.
Wafer SawWafer Saw
How to make
Crafting table: iron ingot x5 + diamond x1 + copper wire x2 + stonecutter x1
Sells for
36,196 yen (Trader, Electronics Dealer)
In real life
A machine that slices silicon thin with a fine wire. It needs 0.5kW of power.
Chip FactoryChip Factory
How to make
Crafting table: glass x3 + copper wire x2 + gold ingot x1 + iron ingot x3
Sells for
4,440 yen (Trader, Electronics Dealer)
In real life
A factory that makes cells and chips in a dust-free room. It needs 0.8kW of power.

Underground ores (Silver Ore, Bauxite)

2 kinds
Silver OreBauxite

Ores ENECRA adds underground (they appear in new places, land loaded for the first time). Smelt Silver Ore in a furnace for a Silver Ingot; 4 Bauxite make 1 Aluminum Ingot in the Refiner.

See data for 2 kinds
Silver OreSilver Ore
How to make
Mine it underground (appears in newly explored areas)
Sells for
1,500 yen (Trader)
BauxiteBauxite
How to make
Mine it underground (appears in newly explored areas)
Sells for
200 yen (Trader)

Imported materials (Tin, Lithium, Gallium, Neodymium, Resin)

5 kinds
TinLithiumGalliumNeodymiumResin (Plastic)

Materials from abroad, bought at the Trader's shop (they can't be made on a crafting table). When you buy one, it tells you why it is imported (resin: its raw material, oil, is almost all imported; tin: the country's mines have closed; lithium: from South America, Australia and elsewhere; gallium: a little is obtained when making other metals; neodymium: a rare earth).

See data for 5 kinds
TinTin
How to make
4 for 4,000 yen at the Trader's shop (imported)
Where to buy
Trader 4,000 yen (x4)
Sells for
300 yen (Trader)
LithiumLithium
How to make
1 for 3,000 yen at the Trader's shop (imported)
Where to buy
Trader 3,000 yen
Sells for
900 yen (Trader)
GalliumGallium
How to make
1 for 3,000 yen at the Trader's shop (imported)
Where to buy
Trader 3,000 yen
Sells for
900 yen (Trader)
NeodymiumNeodymium
How to make
1 for 3,000 yen at the Trader's shop (imported)
Where to buy
Trader 3,000 yen
Sells for
900 yen (Trader)
Resin (Plastic)Resin (Plastic)
How to make
4 for 2,000 yen at the Trader's shop (imported)
Where to buy
Trader 2,000 yen (x4)
Sells for
150 yen (Trader)

Silver Ingot and Aluminum Ingot

2 kinds
Silver IngotAluminum Ingot

Metals you can make yourself or import from the Trader. Silver goes into solder and solar cell electrodes; aluminum into solar panel frames, LEDs and batteries. Making aluminum uses so much power that it is called "canned electricity"; Japan stopped smelting aluminum in 2014 and imports all of its metal.

See data for 2 kinds
Silver IngotSilver Ingot
How to make
Smelt silver ore in a furnace / 1 for 5,000 yen at the Trader's shop (imported)
Where to buy
Trader 5,000 yen
Sells for
1,500 yen (Trader)
In real life
Taken out by smelting silver ore. It can also be imported.
Aluminum IngotAluminum Ingot
How to make
Refiner: bauxite x4 / 1 for 3,000 yen at the Trader's shop (imported)
Where to buy
Trader 3,000 yen
Sells for
900 yen (Trader)
In real life
About 4 tons of bauxite make about 1 ton of aluminum by electrolysis. It uses so much power that it's called "canned electricity".

Copper Wire and Solder

2 kinds
Copper WireSolder

Copper Wire, made from a Copper Ingot on a crafting table, is the most used part (wires, coils, the phone, machines and so on). Solder is lead-free (96.5% tin, 3% silver, 0.5% copper) and attaches the parts of electronic circuits.

See data for 2 kinds
Copper WireCopper Wire
How to make
Crafting table: copper ingot x2 (makes 8)
Sells for
18 yen (Trader)
In real life
Made by drawing copper out thin.
SolderSolder
How to make
Crafting table: tin x4 + silver ingot x1 + copper wire x1 (makes 8)
Sells for
407 yen (Trader)
In real life
Lead-free solder: 96.5% tin, 3% silver, 0.5% copper.

Coil and Neodymium Magnet

2 kinds
CoilNeodymium Magnet

The two hearts of a generator: a coil of copper wire wound around an iron core, and a very strong neodymium magnet (invented in Japan). Turning the magnet makes electricity in the coil; they go into wind and hydro generators (the same idea as the generator in 6th-grade science).

See data for 2 kinds
CoilCoil
How to make
Crafting table: copper wire x8 + iron ingot x1
Sells for
195 yen (Trader)
In real life
Copper wire wound around an iron core. Run power through it and it's an electromagnet; spin a magnet and it's a generator.
Neodymium MagnetNeodymium Magnet
How to make
Crafting table: neodymium x1 + iron ingot x2 (makes 2)
Sells for
563 yen (Trader)
In real life
A very strong magnet of neodymium, iron, and boron. It was invented in Japan.

Printed Circuit Board and Electronic Circuit

2 kinds
Printed Circuit BoardElectronic Circuit

Solder an IC Chip onto a Printed Circuit Board (a board of glass cloth soaked in resin, with copper wiring) to make an Electronic Circuit. It goes into almost everything: generators, batteries, LEDs, wind and hydro.

See data for 2 kinds
Printed Circuit BoardPrinted Circuit Board
How to make
Crafting table: glass x1 + resin (plastic) x1 + copper ingot x1 (makes 2)
Sells for
127 yen (Trader)
In real life
Copper wiring is made on a board of glass cloth soaked in resin.
Electronic CircuitElectronic Circuit
How to make
Crafting table: printed circuit board x1 + IC chip x1 + solder x1
Sells for
725 yen (Trader)
In real life
Parts like IC chips are soldered onto a printed circuit board.

Lithium-ion Cell

Lithium-ion Cell

What is inside a battery: lithium and aluminum foil for the plus side, graphite and copper foil for the minus side, with a resin separator between them. 3 cells make one Battery.

How to make
Crafting table: lithium x1 + graphite x1 + aluminum ingot x1 + copper ingot x1 + resin (plastic) x1 (makes 2)
Sells for
1,278 yen (Trader)
In real life
The plus side is lithium and aluminum foil, the minus side is graphite and copper foil, with a resin separator between.

Solar Cell and Solar Panel

2 kinds
Solar CellSolar Panel

Add silver and aluminum electrodes to a Silicon Wafer to make a Solar Cell (it makes electricity when light hits it; made in the Chip Factory). Connect cells with copper, cover the front with glass, frame it in aluminum and seal it in resin for a Solar Panel. 2 panels make a Solar Generator, 6 an Advanced Solar Generator.

See data for 2 kinds
Solar CellSolar Cell
How to make
Chip Factory: silicon wafer x4 + silver ingot x1 + aluminum ingot x1 (makes 4)
Sells for
746 yen (Trader)
In real life
Silver electrodes go on the front of the wafer and aluminum on the back. When light hits it, it makes power.
Solar PanelSolar Panel
How to make
Crafting table: glass x3 + solar cell x2 + copper wire x1 + aluminum ingot x2 + resin (plastic) x1
Sells for
4,162 yen (Trader)
In real life
The front is glass. Cells are linked with copper, wrapped in resin, and set in an aluminum frame.

LED Chip and IC Chip

2 kinds
LED ChipIC Chip

Chips made from a Silicon Wafer in the Chip Factory (a making machine). The LED Chip grows gallium nitride that glows blue (the blue LED is a Japanese invention) and goes into the Blue LED. The IC Chip has many layers of fine circuits and goes into Electronic Circuits. IC Chips can also be made in the Chip Making Machine (8 from one wafer) and in the Chipmaker's factory.

See data for 2 kinds
LED ChipLED Chip
How to make
Chip Factory: silicon wafer x1 + gallium x1 + resin (plastic) x1 (makes 4)
Sells for
321 yen (Trader)
In real life
Made by growing gallium nitride on a silicon wafer. The blue LED was invented in Japan.
IC ChipIC Chip
How to make
Chip Factory: silicon wafer x1 + copper ingot x1 + resin (plastic) x1 (makes 4)
Sells for
69 yen (Trader)
In real life
Made by stacking many layers of very fine circuits on a silicon wafer.

The silicon path (Metallic Silicon -> Polysilicon -> Silicon Wafer) and Graphite

4 kinds
Metallic SiliconPolysiliconSilicon WaferGraphite

The path from sand (quartz) to a semiconductor wafer. Metallic Silicon = 2 sand or nether quartz and 1 coal or charcoal in the Silicon Arc Furnace (it uses a lot of power; power is expensive in Japan, so all metallic silicon is imported) -> Polysilicon = refined to a higher purity in the Refiner -> Silicon Wafer = sliced thin with a diamond wire in the Wafer Saw (4 wafers from one). Graphite is made from 2 coal heated to about 3000 degrees in the Silicon Arc Furnace; it goes into battery minus electrodes and the electrodes for steelmaking and metallic silicon.

See data for 4 kinds
Metallic SiliconMetallic Silicon
How to make
Silicon Arc Furnace: sand x2 + coal x1 / Silicon Arc Furnace: sand x2 + charcoal x1 / Silicon Arc Furnace: nether quartz x2 + coal x1 / Silicon Arc Furnace: nether quartz x2 + charcoal x1
Sells for
62 yen (Trader)
In real life
Quartz (sand) is heated very hot with carbon in a silicon arc furnace. It uses lots of power. Power is expensive in Japan, so all metallic silicon is imported.
PolysiliconPolysilicon
How to make
Refiner: metallic silicon x1
Sells for
74 yen (Trader)
In real life
Makes metallic silicon even purer (used for solar cells and chips).
Silicon WaferSilicon Wafer
How to make
Wafer Saw: polysilicon x1 (makes 4)
Sells for
22 yen (Trader)
In real life
A block of silicon is sliced thin with a wire coated in diamond grit.
GraphiteGraphite
How to make
Silicon Arc Furnace: coal x2
Sells for
120 yen (Trader)
In real life
Made by heating carbon to about 3,000 degrees in an electric furnace. It becomes the minus side of batteries.

Wafers and chips at each semiconductor step (18)

18 kinds
Wafer in FOUPCleaned WaferOxidized WaferWafer with FilmResist-coated WaferExposed WaferDeveloped WaferEtched WaferWafer with TransistorsMetal-coated WaferResist-coated Wafer (Wiring)Wiring-exposed WaferWired WaferPolished WaferTested WaferChip (Die)Wire-bonded ChipMolded Chip

How the wafer and chip look as they change at each step inside the Chip Making Machine (they can't be made on a crafting table). Stocker -> cleaning -> oxidation -> deposition -> resist -> exposure -> development -> etching -> ion implantation (transistors here) -> second pass of deposition, resist, exposure and etching (wiring) -> CMP -> inspection -> dicing -> bonding -> molding -> IC Chip. You can read what each step means under "19 chip-making steps" in the phone's How to make.

See data for 18 kinds
Wafer in FOUPWafer in FOUP
How to make
Made automatically inside the Chip Making Machine at step 1 "Stocker"
In real life
Wafers travel 25 at a time in a box called a FOUP, carried from machine to machine by overhead vehicles.
Cleaned WaferCleaned Wafer
How to make
Made automatically inside the Chip Making Machine at step 2 "Cleaning"
In real life
Chemicals and pure water wash off invisible dirt. It's washed many times between steps.
Oxidized WaferOxidized Wafer
How to make
Made automatically inside the Chip Making Machine at step 3 "Oxidation"
In real life
Baking it in a furnace at about 1,000 degrees makes a thin glass film (oxide film) on the surface.
Wafer with FilmWafer with Film
How to make
Made automatically inside the Chip Making Machine at step 4 "Deposition"
In real life
Gas or plasma stacks an even thinner film on top.
Resist-coated WaferResist-coated Wafer
How to make
Made automatically inside the Chip Making Machine at step 5 "Resist"
In real life
A chemical that changes with light (resist) is spread thin by spinning the wafer.
Exposed WaferExposed Wafer
How to make
Made automatically inside the Chip Making Machine at step 6 "Exposure"
In real life
Light shines through the circuit master (mask) to print the shape. The chemical changes where light hits.
Developed WaferDeveloped Wafer
How to make
Made automatically inside the Chip Making Machine at step 7 "Developing"
In real life
Washing away the chemical where light hit leaves gaps in the shape of the circuit.
Etched WaferEtched Wafer
How to make
Made automatically inside the Chip Making Machine at step 8 "Etching"
In real life
Plasma cuts away the film under the gaps.
Wafer with TransistorsWafer with Transistors
How to make
Made automatically inside the Chip Making Machine at step 9 "Ion Implantation"
In real life
Ions are shot in to change how electricity flows = transistors (electric switches) are made.
Metal-coated WaferMetal-coated Wafer
How to make
Made automatically inside the Chip Making Machine at step 10 "Deposition (2nd round)"
In real life
2nd round: a film of metal (copper) for wiring is stacked on.
Resist-coated Wafer (Wiring)Resist-coated Wafer (Wiring)
How to make
Made automatically inside the Chip Making Machine at step 11 "Resist (2nd round)"
In real life
2nd round: resist is coated again to print the wiring shape.
Wiring-exposed WaferWiring-exposed Wafer
How to make
Made automatically inside the Chip Making Machine at step 12 "Exposure (2nd round)"
In real life
2nd round: light prints the wiring shape.
Wired WaferWired Wafer
How to make
Made automatically inside the Chip Making Machine at step 13 "Etching (2nd round)"
In real life
2nd round: it's cut into the wiring shape. Real chips repeat this dozens of times to stack dozens of wiring layers.
Polished WaferPolished Wafer
How to make
Made automatically inside the Chip Making Machine at step 14 "CMP"
In real life
A spinning pad and chemicals polish the surface flat as a mirror (CMP).
Tested WaferTested Wafer
How to make
Made automatically inside the Chip Making Machine at step 15 "Wafer Test"
In real life
Needles test each chip one by one. Green is good, red is bad.
Chip (Die)Chip (Die)
How to make
Made automatically inside the Chip Making Machine at step 16 "Dicing"
In real life
A diamond blade cuts the wafer into chips (dicing). From here on is the back end.
Wire-bonded ChipWire-bonded Chip
How to make
Made automatically inside the Chip Making Machine at step 17 "Bonding"
In real life
The chip goes on a base (lead frame) and is connected with gold wire thinner than a hair.
Molded ChipMolded Chip
How to make
Made automatically inside the Chip Making Machine at step 18 "Molding"
In real life
It's wrapped in black resin for protection. That's where the familiar black IC shape comes from.

Scrap iron and the steelmaking steps (Scrap Iron, Scrap Bucket, Molten Steel, Ladle of Molten Steel, Refined Molten Steel, 3 billets)

8 kinds
Scrap IronScrap BucketMolten SteelLadle of Molten SteelRefined Molten SteelHot BilletCut BilletCooled Billet

Scrap iron is used iron (building steel frames, cars, appliances, cans and so on); about a quarter of Japan's steel is made by melting scrap with electricity. The other seven are how the iron looks as it changes at each step inside the Electric Steelmaking Machine (charging -> melting -> tapping -> ladle refining -> continuous casting -> cutting -> cooling bed). Iron tools, armor, rails, buckets, iron bars, cauldrons, hoppers, minecarts, anvils and so on can go straight into the machine as scrap.

See data for 8 kinds
Scrap IronScrap Iron
How to make
Used iron (iron tools, armor, rails, buckets, iron bars, cauldrons, hoppers, minecarts, anvils, etc.). It goes straight into the Electric Steelmaking Machine
In real life
Used iron (building steel frames, cars, appliances, cans, etc.). About a quarter of Japan's steel is made by melting scrap iron with electricity.
Scrap BucketScrap Bucket
How to make
Made automatically inside the Electric Steelmaking Machine at step 2 "Charging"
In real life
A big basket of scrap iron carried over the electric furnace by an overhead crane. Its bottom opens to drop it into the furnace.
Molten SteelMolten Steel
How to make
Made automatically inside the Electric Steelmaking Machine at step 3 "Melting"
In real life
Steel melted at about 1,600 degrees by arcs between the electrodes and the scrap. The graphite electrodes wear down a little too.
Ladle of Molten SteelLadle of Molten Steel
How to make
Made automatically inside the Electric Steelmaking Machine at step 4 "Tapping"
In real life
The furnace tilts to pour the molten steel into a big pot called a ladle (tapping).
Refined Molten SteelRefined Molten Steel
How to make
Made automatically inside the Electric Steelmaking Machine at step 5 "Ladle Refining"
In real life
In the ladle furnace, thin electrodes keep it warm while the composition is adjusted.
Hot BilletHot Billet
How to make
Made automatically inside the Electric Steelmaking Machine at step 6 "Continuous Casting"
In real life
Continuous casting: it's cooled and hardened in a copper mold into long billets. It's still glowing red.
Cut BilletCut Billet
How to make
Made automatically inside the Electric Steelmaking Machine at step 7 "Cutting"
In real life
A gas flame cuts it to set lengths.
Cooled BilletCooled Billet
How to make
Made automatically inside the Electric Steelmaking Machine at step 8 "Cooling Bed"
In real life
It cools slowly on the cooling bed. A black oxide skin (scale) forms on the surface.

The metallic silicon steps (Mixed Charge, Furnace Charge, Molten Silicon, Ladle of Silicon, Refined Silicon, Cast Silicon, lumps, crushed)

8 kinds
Mixed ChargeFurnace ChargeMolten SiliconLadle of SiliconRefined SiliconCast SiliconMetal Silicon LumpCrushed Metal Silicon

How the material looks as it changes at each step inside the Metallic Silicon Machine (weighing -> charging -> reduction -> tapping -> ladle refining -> casting -> cooling -> crushing). Finally it is screened to an even size (10 to 100 mm) and becomes Metallic Silicon.

See data for 8 kinds
Mixed ChargeMixed Charge
How to make
Made automatically inside the Metallic Silicon Machine at step 1 "Weighing"
In real life
Silica (quartz) and charcoal are weighed and mixed in set amounts.
Furnace ChargeFurnace Charge
How to make
Made automatically inside the Metallic Silicon Machine at step 2 "Charging"
In real life
The charging machine scoops from the raw material bins, puts it in the furnace, and stirs it (stoking).
Molten SiliconMolten Silicon
How to make
Made automatically inside the Metallic Silicon Machine at step 3 "Reduction"
In real life
Heated close to 2,000 degrees under the electrodes, carbon takes the oxygen from the quartz (SiO2 + 2C -> Si + 2CO).
Ladle of SiliconLadle of Silicon
How to make
Made automatically inside the Metallic Silicon Machine at step 4 "Tapping"
In real life
The tap hole opens and the molten silicon pours into a ladle.
Refined SiliconRefined Silicon
How to make
Made automatically inside the Metallic Silicon Machine at step 5 "Ladle Refining"
In real life
Oxygen and air are blown in to remove impurities (calcium, aluminum) as slag.
Cast SiliconCast Silicon
How to make
Made automatically inside the Metallic Silicon Machine at step 6 "Casting"
In real life
The ladle tilts to pour it into molds.
Metal Silicon LumpMetal Silicon Lump
How to make
Made automatically inside the Metallic Silicon Machine at step 7 "Cooling"
In real life
It cools and hardens in the mold. A bluish silver.
Crushed Metal SiliconCrushed Metal Silicon
How to make
Made automatically inside the Metallic Silicon Machine at step 8 "Crushing"
In real life
A crusher breaks it up. Then sieves sort it by size (10 to 100 mm).

Spent fuel and the reprocessing steps (Sheared Fuel, Dissolved Fuel Solution, Separated Solution, Purified Solution)

5 kinds
Spent FuelSheared FuelDissolved Fuel SolutionSeparated SolutionPurified Solution

Spent Fuel is fuel (fuel assemblies) that has been used up in a reactor. It collects in the Spent Fuel Pool behind the BWR and can be taken out with a right-click (you can also carry it in a Transport Cask). Take it to the Reprocessor's plant or the Nuclear Fuel Reprocessing Machine and it passes through the other four forms (shearing -> dissolving -> separation -> purification) to become MOX Powder and the rest.

See data for 5 kinds
Spent FuelSpent Fuel
How to make
Spent fuel from a reactor (collects in a waste container). It goes into the Nuclear Fuel Reprocessing Machine still in the waste container (as many as it holds)
In real life
Fuel used up in a reactor (fuel assemblies). It's cooled in a water pool for years, then taken to the reprocessing plant. It goes into the Nuclear Fuel Reprocessing Machine still in its waste container.
Sheared FuelSheared Fuel
How to make
Made automatically inside the Nuclear Fuel Reprocessing Machine at step 2 "Shearing"
In real life
A shearing machine cuts the fuel assemblies into 3 to 4 cm pieces. The fuel inside comes out.
Dissolved Fuel SolutionDissolved Fuel Solution
How to make
Made automatically inside the Nuclear Fuel Reprocessing Machine at step 3 "Dissolving"
In real life
The cut fuel is dissolved in nitric acid: a liquid with uranium, plutonium, and fission products mixed. The cladding that doesn't dissolve is taken out as metal scraps.
Separated SolutionSeparated Solution
How to make
Made automatically inside the Nuclear Fuel Reprocessing Machine at step 4 "Separation"
In real life
An organic liquid is mixed in to separate uranium and plutonium from the fission products (solvent extraction).
Purified SolutionPurified Solution
How to make
Made automatically inside the Nuclear Fuel Reprocessing Machine at step 5 "Purification"
In real life
Uranium and plutonium are each purified once more.
FOLDER7

Thermal Power

The coal boiler and cleaning the smoke · 20 kinds

Thermal Boiler Builder

Thermal Boiler Builder

Builds the boiler side of a coal-fired power plant in one go. The spot you right-click becomes the middle of the front row of the area. It builds the coal feed line (coal yard -> belt conveyor -> coal mill), the furnace and burner panel, the steam drum, the flue gas line (DeNOx unit, electrostatic precipitator, FGD unit, chimney), feedwater, the thermal control panel with the station power panel right below it, and the small parts (coal pipes, the furnace ash hopper, heat transfer tubes). It doesn't build the turbine building, so use it with the Turbine Builder (the same building as the BWR). The Machine Maker sells these two and the Transformer & Switchyard Builder (Compact), three builders, as a coal-fired plant (320 kW).

Where to buy
Machine Maker 73,600,000 yen, a coal-fired plant (with the Turbine Builder) (half with the subsidy)
You get it
When you take the quest “Run a thermal plant” (with the phone started)

Coal Yard

Coal Yard

Where coal is stored. Hold coal and right-click to put it in; the pile grows (up to 64 per yard). If an empty belt conveyor is next to it, it sends one piece per second. Stacking coal yards makes a silo, and coal on upper levels drops down. Lump coal isn't sent through pipes (as in a real plant: lumps travel on conveyors, and only powder goes through pipes).

Belt Conveyor, Coal Mill, Coal Pipe

3 kinds
Belt ConveyorCoal MillCoal Pipe

The belt conveyor carries coal from the coal yard to the pulverizer (you can see coal moving on it). The pulverizer grinds coal into a powder like flour (it burns all at once and evenly). It holds up to 8 pieces' worth of powder and blows it with air through the coal pipe to the burners (the pipe shows powder flowing while it runs). All of these run on power: they stop if the station power panel has no power.

See data for 3 kinds
Belt ConveyorBelt Conveyor
Coal MillCoal Mill
Coal PipeCoal Pipe

Boiler (casing, furnace window, furnace, burner panel, steam drum, furnace ash hopper, heat transfer tubes)

7 kinds
Boiler CasingFurnace WindowBoiler FurnaceBurner PanelSteam DrumFurnace Ash HopperHeat Transfer Tubes

Where coal is burned to turn water into steam. Pulverized coal is blown in from the burner panel, and when lit, flames reach into the furnace (twice as big on high output). The heat transfer tubes are bundles of tubes that pass the fire's heat to the water and steam (in a real boiler even the walls and ceiling are tubes). Heavy ash from the burnt coal falls into the hopper at the bottom of the furnace. The steam drum is a thick drum that separates steam from water; it is where feedwater comes in and where the steam pipe starts (while firing, the connected steam pipe glows white). You can see the fire through the furnace window.

See data for 7 kinds
Boiler CasingBoiler Casing
Furnace WindowFurnace Window
Boiler FurnaceBoiler Furnace
Burner PanelBurner Panel
Steam DrumSteam Drum
Furnace Ash HopperFurnace Ash Hopper
Heat Transfer TubesHeat Transfer Tubes

Cleaning the smoke (DeNOx unit, electrostatic precipitator, FGD unit, chimney) and what it makes (fly ash, gypsum)

7 kinds
DeNOx UnitElectrostatic PrecipitatorFGD UnitChimneyChimney TopGypsumFly Ash

Three stages that clean smoke before it goes out. DeNOx unit = turns NOx (nitrogen oxides) into nitrogen and water with ammonia -> electrostatic precipitator = collects fine ash with static electricity -> FGD unit = removes SOx (sulfur oxides) with limestone water -> out through the chimney. The ash collected by the precipitator (fly ash, a raw material for cement) and the gypsum made by desulfurization (a material for plasterboard) build up one for every 5 coal (up to 20) and can be taken out with an empty hand by right-clicking. Burning always leaves something behind; using it instead of throwing it away is part of thermal power today.

See data for 7 kinds
DeNOx UnitDeNOx Unit
Electrostatic PrecipitatorElectrostatic Precipitator
FGD UnitFGD Unit
ChimneyChimney
Chimney TopChimney Top
GypsumGypsum
Fly AshFly Ash

Thermal Control Panel

Thermal Control Panel

The switch for a thermal power plant. It runs when you send power by wire to the station power panel next to it (right below it if you used the builder): the conveyors, the pulverizer and ignition all need power. Right-click to start (ignite) or stop (put out the fire), and to switch output between low (about 130 kW) and high (about 240 kW). Before starting, it checks the power, the key parts (steam drum, furnace, pulverizer, coal yard), feedwater, the pulverized coal path and the coal, and refuses with the reason if anything is missing. While running, it watches and shows coal feed, feedwater, the coal path, the steam path and the flue gas.

FOLDER8

Turbine & Generator

The building shared by thermal and BWR · 21 kinds

Turbine Builder

Turbine Builder

Builds a turbine building in one go (for both thermal and BWR plants). The spot you right-click becomes the middle of the front row. The turbine (3 x 3 x 5), bearing pedestals and generator (3 x 3 x 3) line up on the turbine pedestal, with the condenser (3 blocks) right under the turbine, the circulating water pump beside it (with intake water below) and the feedwater pipe to the condenser, and the condensate pump in front. At the Generator Terminal past the generator (the green port at the bottom of the generator's end), the Transformer & Switchyard Builder (Compact) can build the step-up transformer and switchyard. It doesn't build a reactor or boiler: use it together with the BWR reactor builder or the Thermal Boiler Builder, and connect them with steam pipes.

You get it
When you take the quest “Run a thermal plant”, “Run a nuclear plant” (with the phone started)
Mission
Handed out in “Power to Homes” mission 3 (teacher tablet training)

Transformer & Switchyard Builder (Compact)

Transformer & Switchyard Builder (Compact)

Builds a compact step-up transformer and switchyard at the exit of a thermal or BWR plant in one go. Right-click the Generator Terminal of a turbine building (the green port at the bottom of the generator's end), and in front of it a row is built: the Plant Inlet (green port) with the Isolated Phase Bus Terminal Box, the Generator Step-up Transformer, the Gas Circuit Breaker, the Line Take-off Structure and the Plant Outlet (green port) (3 blocks wide, 4 high, 8 blocks from the Generator Terminal to the Plant Outlet). There is a one-block gap between the Generator Terminal and the Plant Inlet: connect them with two wires (in front of the terminal and below it). If the space in front is blocked, right-click open ground: the Plant Inlet and terminal box go where you clicked, with the same row behind them (connect a wire from the Generator Terminal to the Plant Inlet's green port). Power goes in only at the Plant Inlet's green port and out only at the Plant Outlet's green port: run a wire from the Plant Outlet to a house or a transmission line. The step-up transformer raises the voltage of the generator's power (about 20,000 V) to send it far (transformation), and the switchyard (gas circuit breaker and take-off structure) connects and disconnects transmission lines. While the connected generator is producing, the transformer's fans turn and the indicator lamps are red (running, closed); when it stops they are green (stopped, open). Right-click each piece of equipment for an explanation at the bottom center of the screen. It comes in the Machine Maker's thermal and BWR sets (three builders). If you built in the wrong place, undo it with the Builder Undo.

Mission
Handed out in “Power to Homes” mission 4 (teacher tablet training)

Turbine and generator parts (casing, bearing, structural glass, steam inlet, bearing pedestal, generator casing and bearing, pedestal)

8 kinds
Turbine Casing PanelTurbine BearingStructural GlassTurbine Steam InletBearing PedestalGenerator CasingGenerator BearingTurbine Pedestal

Parts for building by hand. The turbine is 3 x 3 x 5: turbine bearings at both ends of the 3-block hollow inside, surrounded by casing, structural glass and the steam inlet. The structural glass is a window that shows the blades spinning inside. The turbine steam inlet sits right above a turbine bearing and is where the steam pipe ends. Outside the bearing, two bearing pedestals, then a generator bearing, then the 3 x 3 x 3 generator in a row carry the rotation to the generator. The turbine pedestal is the reinforced concrete base for the turbine and generator (in a real plant too, the condenser sits between the pedestal's columns, right under the turbine).

See data for 8 kinds
Turbine Casing PanelTurbine Casing Panel
Turbine BearingTurbine Bearing
Structural GlassStructural Glass
Turbine Steam InletTurbine Steam Inlet
Bearing PedestalBearing Pedestal
Generator CasingGenerator Casing
Generator BearingGenerator Bearing
Turbine PedestalTurbine Pedestal

Generator Terminal and Stator Coil

2 kinds
Generator TerminalStator Coil

The generator terminal is where the power made goes out to the wire (320 kW per generator = 320 solar generators' worth). Right-click for a monitor of rotation speed (1500 rpm) and output; sneak and right-click for the battery panel. On the Town Power Monitor it appears as "nuclear turbine" or "thermal turbine". The stator coil is the winding inside the generator: while generating, its three sets light up in turn, showing three-phase AC being made in sequence (right-click to see which phase).

See data for 2 kinds
Generator TerminalGenerator Terminal
Stator CoilStator Coil

Pipes (Steam Pipe, Water Pipe)

2 kinds
Steam PipeWater Pipe

The steam pipe connects the main steam nozzle (BWR) or the steam drum (thermal) to the turbine steam inlet. Putting the nozzle and inlet directly against each other doesn't carry steam (you need at least one pipe). The water pipe carries water and connects pumps, condensers, condensate storage tanks, reactor nozzles and steam drums (its core glows while water flows). Both connect when placed next to each other.

See data for 2 kinds
Steam PipeSteam Pipe
You get it
When you take the quest “Run a thermal plant”, “Run a nuclear plant” (with the phone started)
Mission
Handed out in “Power to Homes” mission 3 (teacher tablet training)
Water PipeWater Pipe
You get it
When you take the quest “Run a thermal plant”, “Run a nuclear plant” (with the phone started)
Mission
Handed out in “Power to Homes” mission 3 (teacher tablet training)

Pumps (Water Pump, High-Performance Pump, Circulating Water Pump, Condensate Pump)

4 kinds
Water PumpHigh-Performance PumpCirculating Water Pump (CWP)Condensate Pump

All of these pumps run on power (feedwater 0.3 kW, circulating water 0.6 kW, condensate 0.2 kW). Port colors: green ports are for wires and light blue ports for water pipes (a water pipe doesn't connect to a pump's green port, and a wire doesn't connect to its light blue port). Even with a wire connected, a pump doesn't run if the network's generation is less than the power it uses (the screen shows the network's generation and the power used). The water pump pushes water into the reactor or boiler (if it keeps pumping raw water from the sea or a river, it clogs with debris and shellfish: right-click to clean it). The High-Performance Pump does the same job and doesn't clog (right-click for a comparison table). The circulating water pump, the biggest pump in the plant, sends cold sea or river water to the condenser. The condensate pump sends water from the bottom of the condenser to the water pump (without power, the water from the condenser beyond it doesn't come back).

See data for 4 kinds
Water PumpWater Pump
High-Performance PumpHigh-Performance Pump
Circulating Water Pump (CWP)Circulating Water Pump (CWP)
Condensate PumpCondensate Pump

Condenser and Condensate Storage Tank (pure water)

2 kinds
CondenserCondensate Storage Tank

The condenser cools the steam that has finished turning the turbine with cold water, turning it back into water (3 blocks make one condenser; while the turbine is turning, the tubes and the water flow inside the window move). It cools if there is water around it or a circulating water pump is connected by water pipe. Cooled, it makes the fuel last longer. Connect water pipes to the light-blue ports at both ends. The condensate storage tank holds clean water (pure water) that is safe to put in the reactor. It is for starting up and goes down during operation: to keep running, make a closed loop where water comes back from the condenser (condenser -> condensate pump -> water pump -> reactor). Right-click to see the water left and whether the loop is closed.

See data for 2 kinds
CondenserCondenser
Condensate Storage TankCondensate Storage Tank

Station Power Panel

Station Power Panel

The panel where power enters the plant. Until it is running, a power plant can't do anything without borrowing power from outside. Place it next to the main control panel (BWR) or the thermal control panel (right below it if you used a builder) and send power to it by wire from an outside generator. The BWR's own power use (the main control panel and pumps) totals about 2.2 kW, so one generator may not be enough. It passes power through, so it doesn't stop power if placed partway along a line.

FOLDER9

Nuclear: BWR

The BWR reactor and its fuel · 21 kinds

BWR Reactor Builder

BWR Reactor Builder

Builds everything around the reactor in one go. The spot you right-click becomes the middle of the front row. It builds the pressure vessel (5 x 5 x 8, with viewing windows) with two fuel assemblies and a control rod inside, the control rod drive room, the steam separator and steam dryer, the main control panel in front with the station power panel right below it, the emergency diesel generator, two recirculation pumps on the left and right, the water pump, condensate storage tank and water pipes on the right, and the fuel tank, spent fuel pool and fuel pipes at the back (you place the steam pipe from the main steam nozzle to the turbine yourself). Uranium fuel and the turbine building aren't included. A newly built reactor always starts in "Shut down (control rods fully inserted)". The Machine Maker sells it together with the Turbine Builder and the Transformer & Switchyard Builder (Compact), three builders, as a BWR plant (320 kW).

Where to buy
Machine Maker 128,000,000 yen, a BWR plant (with the Turbine Builder) (half with the subsidy)
You get it
When you take the quest “Run a nuclear plant” (with the phone started)
Mission
Handed out in “Power to Homes” mission 3 (teacher tablet training)

Pressure vessel (shell, curved corner, dome, shielding window) and control rod drive room

5 kinds
RPV ShellRPV CornerRPV DomeShielding WindowCRD Housing

The outermost guard that holds the water and steam inside at high pressure. Only when the base, body and dome are complete without a single missing block is the "structure complete". The curved corner shows the roundness of the cylinder, and the shielding window is a wall you can see through while it blocks radiation (the builder uses it for everything except the corners and nozzles). The control rod drive room under the pressure vessel holds the machines that move the control rods in and out (BWR control rods enter from below because of this room).

See data for 5 kinds
RPV ShellRPV Shell
RPV CornerRPV Corner
RPV DomeRPV Dome
Shielding WindowShielding Window
CRD HousingCRD Housing

Reactor Nozzle, Main Steam Nozzle, Recirculation Nozzle

3 kinds
Reactor NozzleMain Steam NozzleRecirculation Nozzle

The reactor nozzle is where water goes into the reactor, and it is also the operator's small control panel (connect water pipes here; hold uranium fuel and right-click to load it; right-click with an empty hand for fuel, temperature, water level, feedwater and core flow). Even during an emergency shutdown, you can restart from here once it has cooled. The main steam nozzle is the outlet for the boiled steam, where the steam pipe starts (on the side, as in a real plant). The recirculation nozzle is the thick port the recirculation pump connects to.

See data for 3 kinds
Reactor NozzleReactor Nozzle
Main Steam NozzleMain Steam Nozzle
Recirculation NozzleRecirculation Nozzle

Steam Separator and Steam Dryer

2 kinds
Steam SeparatorSteam Dryer

Freshly boiled steam carries water droplets. The steam separator spins it to separate the water and send it back to the reactor, and the steam dryer removes the last moisture by passing it between corrugated plates. Only dry steam goes to the turbine, so the blades aren't worn away by droplets. With both, the reactor nozzle screen shows a "dryness" of 99.9% (it can still generate power without them).

See data for 2 kinds
Steam SeparatorSteam Separator
Steam DryerSteam Dryer

Main Control Panel

Main Control Panel

The plant's central control room. It shows the current state and what to do next, so look here first when you're unsure. Button 1 = start (withdraw control rods) / stop; button 2 = SCRAM (emergency shutdown) / reset. Starting works only when the structure is complete, there is fuel and water, spent fuel hasn't built up too much in the reactor, SCRAM is reset and station power is available, and in addition a turbine is connected by steam pipe from the main steam nozzle, its condenser is cooled, and there is a loop returning water from the condenser to feedwater (condenser -> water pump -> reactor). If anything is missing, pressing it doesn't start the reactor and shows what to do next.

Control Rod and Fuel Assembly

2 kinds
Control RodFuel Assembly

The column at the center of the reactor. Only when a control rod sits on top of two fuel assemblies is it recognized as a reactor. The fuel makes heat, and the control rod holds back the fission. The position goes from notch 00 (fully inserted) to 48 (fully withdrawn), read the same way as in a real control room. A normal withdrawal takes about 8.5 seconds; an emergency shutdown drives them in all at once in about 1.5 seconds. The reactor's records (fuel, temperature, water level and so on) are tied to the control rod's position: breaking the control rod erases the records.

See data for 2 kinds
Control RodControl Rod
Fuel AssemblyFuel Assembly

Fuel (Uranium Dioxide Fuel, Fuel Tank, Fuel Pipe)

3 kinds
Uranium Dioxide FuelFuel TankFuel Pipe

One uranium fuel runs the reactor for 4 minutes, and the reactor can hold up to 5 (20 minutes) (it lasts longer if the condenser lets you reuse water). Sold by the Trader (all uranium ore is imported). The fuel tank holds up to 10; connected to the reactor by fuel pipe, it sends one automatically when the reactor drops below one. The fuel pipe also carries used fuel to the spent fuel pool (or a transport cask).

See data for 3 kinds
Uranium Dioxide FuelUranium Dioxide Fuel
Where to buy
Trader 2,000 yen
Sells for
600 yen (Trader)
Mission
Handed out in “Power to Homes” mission 3 (teacher tablet training)
Fuel TankFuel Tank
Fuel PipeFuel Pipe

Recirculation Pump

Recirculation Pump

A pump that circulates the water in the reactor and sweeps away the bubbles around the fuel: this is how a BWR changes its output. Send it power by wire (0.5 kW) and right-click to switch the flow between low, medium and high. Without power, natural circulation gives half the output. If they all stop during operation, the reactor quiets itself even without moving the control rods.

Spent Fuel Cask

Spent Fuel Cask

A thick container for carrying spent fuel (up to 20). Connected to the reactor by fuel pipe, it collects used fuel. Right-clicking only shows what is inside (it doesn't empty it). When full, the band on the lid turns red. Break it to carry it with its contents (the count is written on it); place it again and it keeps collecting. You can take the cask as it is to the Reprocessor, the Nuclear Fuel Reprocessing Machine, or the receiving pool of a hand-built reprocessing plant. The BWR builder puts a spent fuel pool behind the reactor (right-click it to take out all the fuel inside).

Emergency Diesel Generator

Emergency Diesel Generator

The reactor's emergency power supply (not a generator for selling power). It normally sleeps, and wakes up by itself to generate (2.4 kW) when a reactor within 16 blocks has an emergency shutdown or gives off decay heat. It is a backup to keep the main control panel and pumps running even if outside power stops. The BWR builder builds it near the station power panel, together with a wire. There is no fueling to do.

Earthquake Test Button (drill)

Earthquake Test Button (drill)

A drill tool that causes a simulated earthquake. Using it shakes the screen with a rumble, shows "high acceleration trip" to players nearby, and every running reactor shuts down on the spot. You can then practice checking that the emergency diesel generator starts up properly.

FOLDER10

Nuclear: PWR

The PWR containment, turbine and switchyard · 99 kinds

PWR Plant Builder

PWR Plant Builder

Builds the whole set of equipment inside the containment (4 loops): the reactor vessel (with shielding glass windows), 4 steam generators, 4 reactor coolant pumps, the pressurizer, the volume control tank, the boric acid batching tank, the main control panel with the station power panel, and the primary coolant piping. When it is finished, chat tells you where the pipe outlets (main steam and feedwater) come out of the front wall and where the main control panel is. Fuel assemblies and boric acid (powder) aren't included: load them yourself. Sneak and right-click to read about the team mission crews. The Machine Maker sells it with the turbine-generator and transformer/switchyard builders as a PWR plant (400 kW).

Where to buy
Machine Maker 160,000,000 yen, a PWR plant (3 builders) (half with the subsidy)

Reactor vessel (Reactor Vessel, shell, corner, bottom head, head, rounded shell)

6 kinds
Reactor VesselReactor Vessel ShellReactor Vessel CornerReactor Vessel Bottom HeadReactor Vessel HeadVessel Shell (Rounded)

An upright cylindrical vessel where uranium fission heats the primary water (without boiling it). The Reactor Vessel block is the center of the plant: right-click it with an empty hand to see the primary pressure and temperature. The shell is steel about 26 cm thick, and the bottom head is the hemispherical bottom (the in-core instrument guide tubes come out the bottom here, a shape unique to PWRs). The control rod drive mechanisms stand on the head. Breaking part of the vessel during operation counts as a loss of coolant and causes an emergency shutdown.

See data for 6 kinds
Reactor VesselReactor Vessel
Reactor Vessel ShellReactor Vessel Shell
Reactor Vessel CornerReactor Vessel Corner
Reactor Vessel Bottom HeadReactor Vessel Bottom Head
Reactor Vessel HeadReactor Vessel Head
Vessel Shell (Rounded)Vessel Shell (Rounded)

Shielding Glass and Inspection Window Glass

2 kinds
Shielding GlassInspection Window Glass

Shielding glass is a viewing window that blocks radiation while letting you see the core (in a real plant, thick glass with lead in it). The builder opens a window in the middle of each side of the reactor, so you can see the height of the fuel assemblies and the control rod clusters. Inspection window glass is a window for seeing inside equipment.

See data for 2 kinds
Shielding GlassShielding Glass
Inspection Window GlassInspection Window Glass

Fuel Assembly (PWR)

Fuel Assembly

A column of fuel rods bundled in a 17 x 17 grid that gives off the heat of fission (a real plant lines up 193 columns about 4 m tall). With it in your inventory, press "Load fuel (crane)" on the main control panel: one loads 9 assemblies' worth (2 levels of the core). Two loads make 18 = full, and the head closes automatically.

Light level
7

Control Rod Cluster and Control Rod Drive Mechanism (2-block set)

2 kinds
Control Rod ClusterControl Rod Drive Mechanism (2-block set)

The rod cluster hangs thin rods like spider legs and inserts them into the core from above (different from the BWR's cross-shaped control rods, and inserted the opposite way). The control rod drive mechanism is a tube standing on the head; a magnetic jack moves the drive shaft inside up and down one step at a time by re-gripping it. In an emergency shutdown the magnets are released and the rods drop all at once under their own weight. Placing one gives you 2 blocks.

See data for 2 kinds
Control Rod ClusterControl Rod Cluster
Control Rod Drive Mechanism (2-block set)Control Rod Drive Mechanism (2-block set)

In-core Instrument Guide Tube and Primary Coolant

2 kinds
In-core Instrument Guide TubePrimary Coolant

The in-core instrument guide tube measures uneven power in the core from below (in a PWR the control rods enter from above, so the bottom is free for this shape). Primary coolant is the water in the reactor vessel. It is pressurized to 155 bar, so it doesn't boil even at 320 degrees: that is where the name "pressurized water reactor" comes from. It is the block you see inside through the windows.

See data for 2 kinds
In-core Instrument Guide TubeIn-core Instrument Guide Tube
Primary CoolantPrimary Coolant
Light level
4

Primary Coolant Pipe, Primary Coolant Nozzle, Reactor Coolant Pump (7-block set)

3 kinds
Primary Coolant PipePrimary Coolant NozzleReactor Coolant Pump (7-block set)

The red primary piping and the ports that connect pipes to vessels. Hot radioactive water (320 degrees) passes through, always in a closed loop back to the reactor. If the steam generators, pressurizer and reactor coolant pumps aren't connected with red piping, "the primary loop is broken" appears and it can't run. The reactor coolant pump keeps circulating water between the reactor and the steam generators. The flywheel on its motor keeps it turning by momentum even if power is lost, protecting the core. Placing one gives you 7 blocks.

See data for 3 kinds
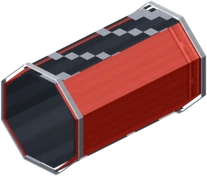
Primary Coolant PipePrimary Coolant Pipe
Primary Coolant NozzlePrimary Coolant Nozzle
Reactor Coolant Pump (7-block set)Reactor Coolant Pump (7-block set)

Steam generator (lower shell, shell, corner shell, rounded jacket, cone, upper shell, head)

7 kinds
Steam Generator Lower ShellSteam Generator ShellSteam Generator Shell (Corner)Steam Generator Jacket (Rounded)Steam Generator ConeSteam Generator Upper ShellSteam Generator Head

The heart of a PWR, where the primary heat boils the secondary water. Primary water flows only inside the tubes (heat transfer tubes) and doesn't mix with the water outside: radioactive water goes no further than here. It is narrow at the bottom and wide at the top because the top needs room for the steam separators and moisture separators. The head is the main steam outlet. A real one is 21 m tall and stands higher than the reactor vessel.

See data for 7 kinds
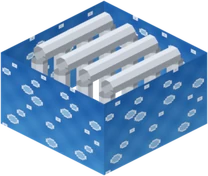
Steam Generator Lower ShellSteam Generator Lower Shell
Steam Generator ShellSteam Generator Shell
Steam Generator Shell (Corner)Steam Generator Shell (Corner)
Steam Generator Jacket (Rounded)Steam Generator Jacket (Rounded)
Steam Generator ConeSteam Generator Cone
Steam Generator Upper ShellSteam Generator Upper Shell
Steam Generator HeadSteam Generator Head

Pressurizer (shell, rounded jacket, internals, upper head) and Pressurizer Relief Tank

5 kinds
Pressurizer ShellPressurizer Jacket (Round)Pressurizer InteriorPressurizer Upper Head (Top Set)Pressurizer Relief Tank

A tall vessel (only one) that pressurizes the primary loop so it doesn't boil. From the bottom up it holds heaters -> water -> the water surface -> steam -> spray. Heating the water swells the steam above the surface and raises the pressure; spraying cold water lowers it. Placing the upper head adds the safety valves, relief valves, manhole, instruments and spray nozzle. The relief tank turns steam released from the valves back into water.

See data for 5 kinds
Pressurizer ShellPressurizer Shell
Pressurizer Jacket (Round)Pressurizer Jacket (Round)
Pressurizer InteriorPressurizer Interior
Pressurizer Upper Head (Top Set)Pressurizer Upper Head (Top Set)
Pressurizer Relief TankPressurizer Relief Tank

Volume Control Tank (CVCS) and Charging Pump (CVCS)

2 kinds
Volume Control Tank (CVCS)Charging Pump (CVCS)

A system that takes out and puts back a little primary water at a time, keeping its cleanliness and amount. In a newly built plant, while it is cold and stopped, right-click the volume control tank to fill the primary loop with pure water (filling; not needed the second time). Diluting the boron is done from here too. The charging pump is a high-pressure pump that pushes the tank's water back into the primary loop.

See data for 2 kinds
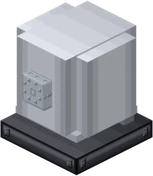
Volume Control Tank (CVCS)Volume Control Tank (CVCS)
Charging Pump (CVCS)Charging Pump (CVCS)

Boric Acid Batching Tank (2-block set) and Boric Acid (powder)

2 kinds
Boric Acid Batching Tank (2-block set)Boric Acid (powder)

Boric acid absorbs neutrons: a "chemical control rod". Hold boric acid (powder) and right-click the batching tank to dissolve it in warm water into boric acid solution (up to 4 batches). Each startup uses one batch. Without the tank or without boric acid solution, the main control panel won't start the plant. Place it next to the volume control tank.

See data for 2 kinds
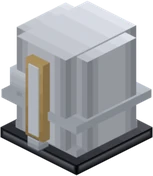
Boric Acid Batching Tank (2-block set)Boric Acid Batching Tank (2-block set)
Boric Acid (powder)Boric Acid (powder)

Containment Penetration

Containment Penetration

Where pipes pass through the containment wall. This is the only place allowed to go through the wall, and only secondary pipes pass through it.

Main Steam Pipe, Main Steam Nozzle, Feedwater Pipe, Feedwater Nozzle

4 kinds
Main Steam PipeMain Steam NozzleFeedwater PipeFeedwater Nozzle

The secondary pipes. The main steam pipe carries steam from the steam generator heads to the turbine (its port is the orange main steam nozzle). The feedwater pipe returns water condensed in the condenser to the steam generators through the condensate pumps, heaters and feedwater pumps (its port is the light-blue feedwater nozzle). Between the reactor builder and the turbine-generator builder, you lay these two pipes yourself. If the feedwater pipe isn't connected, the main control panel won't let you raise output.

See data for 4 kinds
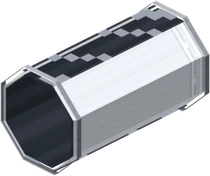
Main Steam PipeMain Steam Pipe
Main Steam NozzleMain Steam Nozzle
Feedwater PipeFeedwater Pipe
Feedwater NozzleFeedwater Nozzle

Main Control Panel and Station Power Panel (PWR)

2 kinds
Main Control PanelStation Power Panel (PWR)

The main control panel is the brain of the plant. Right-click it to see the current stage, the state of the primary and secondary loops, and a "hint (what to do next)"; the button below advances to the next stage (when you can't advance, the button becomes "Refresh"). Loading and refueling, and stopping during operation (SCRAM), are here too. The station power panel, placed right below the main control panel, receives power by wire from outside power plants (if it is missing, has no wire or has no power, the reason is shown and you can't go on).

See data for 2 kinds
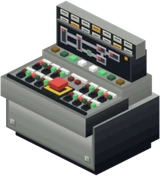
Main Control PanelMain Control Panel
Station Power Panel (PWR)Station Power Panel (PWR)

PWR Turbine-Generator Builder

PWR Turbine-Generator Builder

Builds the whole row of turbine building equipment: the shaft line of main steam stop valve and control valves -> high-pressure turbine -> (moisture separator reheaters on both sides) -> 3 low-pressure turbines -> generator -> exciter, the condenser right below, the feedwater line (condensate pumps, feedwater heaters, deaerator, feedwater pumps), the circulating water pumps, intake and discharge, and the generator's terminal box and isolated phase bus. When it is finished, chat tells you where to use the transformer/switchyard builder next. Sneak and right-click to choose "full set" or "leave the connections" (the 6 circulating water pipe risers are placed by hand = the turbine crew) (during team missions it leaves them automatically).

Turbine Steam Inlet, Main Steam Stop & Control Valves, Valve Actuator

3 kinds
Turbine Steam InletMain Steam Stop & Control ValvesValve Actuator

Connect the main steam pipe to the turbine steam inlet. From there it passes the valves to the high-pressure turbine. The stop valve shuts off all steam in an emergency, and the control valve adjusts the amount of steam to match the output. The valve actuator is the hydraulic moving part that opens and closes the valves; on a trip signal they all close at once.

See data for 3 kinds
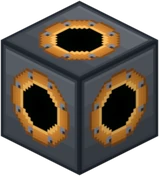
Turbine Steam InletTurbine Steam Inlet
Main Steam Stop & Control ValvesMain Steam Stop & Control Valves
Valve ActuatorValve Actuator

High-pressure turbine casing, rounded casing, Crossover Pipe

3 kinds
High-Pressure Turbine CasingHP Turbine Casing (Round)Crossover Pipe

The first turbine to spin, on steam from the steam generators. The steam that leaves it has its moisture removed and is reheated in the moisture separator reheaters, then passes to the low-pressure turbines through the crossover pipe (the thick gold pipe).

See data for 3 kinds
High-Pressure Turbine CasingHigh-Pressure Turbine Casing
HP Turbine Casing (Round)HP Turbine Casing (Round)
Crossover PipeCrossover Pipe

Moisture separator reheater (shell, rounded shell, end nozzles, separator element, reheater tube bundle)

5 kinds
Moisture Separator ReheaterMSR Shell (Round)MSR End NozzlesMoisture Separator Element (Chevron)Reheater Tube Bundle

A long cylinder (on both sides of the shaft line) that removes droplets from the steam leaving the high-pressure turbine and reheats it. Wet steam would damage the low-pressure turbine blades. Droplets hit the zigzag of corrugated plates (the moisture separator element) and fall off, and main steam passing inside the reheater tube bundle reheats the steam outside. A quiet piece of equipment with no moving parts.

See data for 5 kinds
Moisture Separator ReheaterMoisture Separator Reheater
MSR Shell (Round)MSR Shell (Round)
MSR End NozzlesMSR End Nozzles
Moisture Separator Element (Chevron)Moisture Separator Element (Chevron)
Reheater Tube BundleReheater Tube Bundle

Low-pressure turbine casing and rounded casing

2 kinds
Low-Pressure Turbine CasingLP Turbine Casing (Round)

Three of them squeeze out the power left in the steam. Through the window you can see rows of blades, getting larger stage by stage, spinning. The steam that leaves goes back to water in the condenser right below.

See data for 2 kinds
Low-Pressure Turbine CasingLow-Pressure Turbine Casing
LP Turbine Casing (Round)LP Turbine Casing (Round)

Bearing Pedestal (3-block set) and Shaft Gland

2 kinds
Bearing Pedestal (3-block set)Shaft Gland (casing end wall)

The bearing pedestal rises from the floor and holds the rotating shaft on a film of oil (the metal parts never touch). Placing one gives you 3 blocks, and breaking any one removes them all. The shaft gland is where the shaft passes through the end wall of the casing: a seal that lets the shaft through without leaking steam.

See data for 2 kinds
Bearing Pedestal (3-block set)Bearing Pedestal (3-block set)
Shaft Gland (casing end wall)Shaft Gland (casing end wall)

Condenser (condenser, shell, flared shell, waterbox, tube bundle, tubesheet, hotwell, condensing steam)

8 kinds
CondenserCondenser ShellCondenser Shell (Flare)Condenser Water BoxCondenser Tube BundleCondenser TubesheetHotwell CondensateCondensing Steam

The vessel right under the low-pressure turbines that cools steam with seawater and turns it back into water. Inside is a vacuum, so the steam flows in easily. The waterboxes are the seawater inlet and outlet (sneak and right-click with an empty hand to switch the whole set between inlet and outlet). Seawater flows inside the thin tubes and cools the steam outside them (a real condenser has over 10,000 tubes). The tubesheet is the thick plate the tubes are fixed into. The water collects in the hotwell and is sent out by the condensate pumps. Without a condenser, the main control panel won't let the turbine turn.

See data for 8 kinds
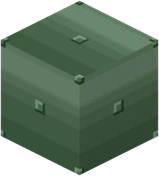
CondenserCondenser
Condenser ShellCondenser Shell
Condenser Shell (Flare)Condenser Shell (Flare)
Condenser Water BoxCondenser Water Box
Condenser Tube BundleCondenser Tube Bundle
Condenser TubesheetCondenser Tubesheet
Hotwell CondensateHotwell Condensate
Condensing SteamCondensing Steam

Condensate Pump, LP Feedwater Heater, Deaerator, Feedwater Pump, HP Feedwater Heater

5 kinds
Condensate PumpLP Feedwater HeaterDeaeratorFeedwater PumpHP Feedwater Heater

The feedwater line that sends the secondary water, now water again, back to the steam generators. The condensate pump draws water from the bottom of the condenser, the LP feedwater heater warms it with steam taken from partway through the turbine, the deaerator removes the oxygen dissolved in it (left in, it would rust the pipes), the feedwater pump sends it on, and the HP feedwater heater warms it further. The warmer the water when it goes back, the more efficient the power generation.

See data for 5 kinds
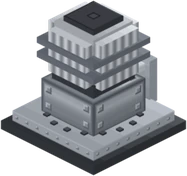
Condensate PumpCondensate Pump
LP Feedwater HeaterLP Feedwater Heater
DeaeratorDeaerator
Feedwater PumpFeedwater Pump
HP Feedwater HeaterHP Feedwater Heater

Circulating Water Pump (3-block set), Circulating Water Pipe, Seawater Intake (Bar Screen), Discharge Outfall

4 kinds
Circulating Water Pump (3-block set)Circulating Water PipeWater Intake (Bar Screen)Discharge Outfall

The third loop of water (circulating water). The intake takes in water from the sea, and its bar screen stops debris: it isn't cooling water unless water (sea or river) touches it within 2 blocks to the side or below. The circulating water pump lifts the water and sends it through the circulating water pipe to the condenser's waterboxes, and the warmed water (about 7 degrees warmer in a real plant) goes back to the sea through the outfall. Seawater and secondary water never mix.

See data for 4 kinds
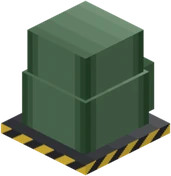
Circulating Water Pump (3-block set)Circulating Water Pump (3-block set)
Circulating Water PipeCirculating Water Pipe
Water Intake (Bar Screen)Water Intake (Bar Screen)
Discharge OutfallDischarge Outfall

Generator casing, rounded casing, stator (core / coil end)

3 kinds
Generator CasingGenerator Casing (Round)Generator Stator (Core / Coil End)

The machine that turns on the same shaft as the turbine and makes electricity (a real one is cooled inside with hydrogen). The stator is the part that doesn't turn, with coils in an iron core; when the rotor (a spinning magnet) turns inside, electricity is made in the coils. Through the window you can see it turning and the copper-colored coils.

See data for 3 kinds
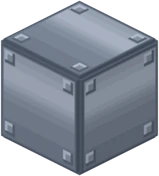
Generator CasingGenerator Casing
Generator Casing (Round)Generator Casing (Round)
Generator Stator (Core / Coil End)Generator Stator (Core / Coil End)

Exciter, rounded casing, armature (with rotating rectifier)

3 kinds
ExciterExciter Casing (Rounded)Exciter Armature (Rotating Rectifier)

A small generator (at the very end of the shaft line) that supplies the power for the generator's magnet. A rotating rectifier turns it into DC to strengthen the rotor's magnet. It has no brushes, so there are no sparks. Without it, the generator makes no power even when it turns.

See data for 3 kinds
ExciterExciter
Exciter Casing (Rounded)Exciter Casing (Rounded)
Exciter Armature (Rotating Rectifier)Exciter Armature (Rotating Rectifier)

Generator Terminal Box, Isolated-Phase Bus, Phase Marker Plate

3 kinds
Generator Terminal Box (Power Outlet, per phase)Isolated-Phase BusPhase Marker Plate (A red / B white / C blue)

The terminal box is the end of the stator windings, where the generated power comes out (right-click for the output and the stored power). The isolated-phase bus carries the generator's power (about 20,000 V) to the main transformer, with each phase in its own aluminum tube: three in a row. Its shape (straight, vertical, bend, T) is decided just by placing it; sneak and right-click with an empty hand to switch the phase between A, B and C. The phase marker plate shows the phase at a glance (red = A, white = B, blue = C).

See data for 3 kinds
Generator Terminal Box (Power Outlet, per phase)Generator Terminal Box (Power Outlet, per phase)
Isolated-Phase BusIsolated-Phase Bus
Phase Marker Plate (A red / B white / C blue)Phase Marker Plate (A red / B white / C blue)

PWR Transformer & Switchyard Builder

PWR Transformer & Switchyard Builder

Builds the whole place that sends the plant's power out to the transmission lines: main transformer -> outdoor switchyard (3 buses, 2 circuits) -> transmission tower, in that order. The spot you right-click becomes the middle of the front row. Use it where chat tells you after using the turbine-generator builder. Sneak and right-click to choose "leave the connections" (the 3 isolated phase bus drops are placed by hand = the power line crew) (during team missions it leaves them automatically).

Main transformer (tank, LV bushing, radiator, conservator, HV bushing, nameplate, manhole)

7 kinds
Main Transformer TankMain Transformer LV BushingMain Transformer Radiator (OFAF fan)Main Transformer ConservatorMain Transformer HV BushingMain Transformer NameplateMain Transformer Manhole

Raises the generator's 20,000 V or so to a high voltage for transmission (275,000 to 500,000 V). The tank is full of insulating oil, cooled by the radiator's fins and fans (the fans turn only while generating). The conservator gives the oil room to expand and shrink. The LV bushing receives the isolated-phase bus; the HV bushing is the outlet to the transmission line. The builder builds the full set; blocks you place by hand become the parts for any missing spots and repair it.

See data for 7 kinds
Main Transformer TankMain Transformer Tank
Main Transformer LV BushingMain Transformer LV Bushing
Main Transformer Radiator (OFAF fan)Main Transformer Radiator (OFAF fan)
Main Transformer ConservatorMain Transformer Conservator
Main Transformer HV BushingMain Transformer HV Bushing
Main Transformer NameplateMain Transformer Nameplate
Main Transformer ManholeMain Transformer Manhole

Switchyard (gantry, bus, circuit breaker, disconnector, current/voltage transformer, surge arrester, control building)

7 kinds
Switchyard GantrySwitchyard BusCircuit Breaker (4-block set)Disconnector (4-block set)Current / Voltage Transformer (4-block set)Lightning Arrester (4-block set)Switchyard Relay House

Outdoor equipment that gathers the plant's power and distributes it to each transmission line. The gantry is the steel frame that holds the buses and incoming lines in the air; the bus is an aluminum tube that connects just by placing it. The circuit breaker is the only machine that can cut a line while current is flowing (in an accident it cuts in about 0.05 seconds). The disconnector opens after the current is cut to make a "visible gap". The current and voltage transformers measure current and voltage and send them to the protective relays, and the surge arrester sends lightning's high voltage into the ground. The control building, with protective relay panels and batteries, is the brain of the switchyard.

See data for 7 kinds
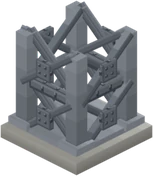
Switchyard GantrySwitchyard Gantry
Switchyard BusSwitchyard Bus
Circuit Breaker (4-block set)Circuit Breaker (4-block set)
Disconnector (4-block set)Disconnector (4-block set)
Current / Voltage Transformer (4-block set)Current / Voltage Transformer (4-block set)
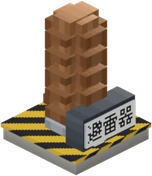
Lightning Arrester (4-block set)Lightning Arrester (4-block set)
Switchyard Relay HouseSwitchyard Relay House

Transmission Tower (26-block set, 2 circuits) and Overhead Power Line

2 kinds
Transmission Tower (26-block set)Overhead Power Line

Placing one tower gives you a 26-block, 2-circuit tower. Place an overhead power line right below the hanging fitting at the tip of a crossarm and it connects (6 hanging points = in a real tower, 3 lines make one circuit). The overhead line carries power like a wire on the ground (in ENECRA it all flows as one). From the switchyard, along the towers, to the town's substations and homes. The tower's steel frame doesn't conduct power.

See data for 2 kinds
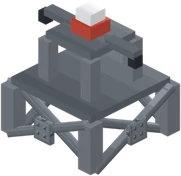
Transmission Tower (26-block set)Transmission Tower (26-block set)
Overhead Power LineOverhead Power Line
FOLDER11

Nuclear Fuel Cycle

Reprocessing parts and what it makes · 24 kinds

About the hand-built reprocessing plant

Reprocessing Control Panel

The parts in this chapter are for a reprocessing plant you build by placing parts by hand (the plant's shape from an earlier version). The main ways to reprocess are the Reprocessor in town (bring spent fuel) and the Nuclear Fuel Reprocessing Machine. The Reprocessing Control Panel is the plant's switch and receives power when you connect a wire. Right-click it to run the 6 steps in order over about 20 seconds (auto-run). Before running, it checks that all the plant's parts are there (it tells you what is missing), that there are at least 5 fuel assemblies in the pool, and that at least 60 J of power is stored. It searches for parts within 18 blocks of the panel, so put the panel in the middle of the plant.

Receiving Storage Pool, Transport Cask (decoration), Travelling Crane

3 kinds
Receiving Storage PoolTransport CaskTravelling Crane

The receiving pool is the plant's entrance. Hold a transport cask or spent fuel and right-click it, and the fuel sinks into the water (the cask comes back to you empty; up to 20; 5 are used per run). The transport cask in this chapter is a decoration for the plant's look (the cask that carries fuel is the one in the BWR chapter). The travelling crane is a carriage that runs above the pool and carries the fuel to the shear during auto-run.

See data for 3 kinds
Receiving Storage PoolReceiving Storage Pool
Transport CaskTransport Cask
Travelling CraneTravelling Crane

Shearing Machine and Dissolver

2 kinds
Shearing MachineDissolver

The shearing machine cuts the incoming fuel assemblies into 3 to 4 cm pieces (the blade appears when you place it). The pieces fall down a chute into the dissolver. Metal pieces that don't dissolve, such as cladding, collect in the metal scrap container. The dissolver dissolves the cut fuel in nitric acid. From here on, everything moves as liquid.

See data for 2 kinds
Shearing MachineShearing Machine
DissolverDissolver

Centrifugal Extractor, Separation Tower, Purification Tower

3 kinds
Centrifugal ExtractorSeparation TowerPurification Tower

The centrifugal extractor spins to separate the mixed liquid into uranium, plutonium and fission products, and the separation tower receives them. The purification towers clean the separated uranium and plutonium. In the game you can tell them apart by color (yellow = uranium, purple = plutonium, green = fission products).

See data for 3 kinds
Centrifugal ExtractorCentrifugal Extractor
Separation TowerSeparation Tower
Purification TowerPurification Tower

Denitration Furnace and Product Storage

2 kinds
Denitration FurnaceProduct Storage

The denitration furnace combines the cleaned uranium and plutonium and drives off the nitric acid to make powder = MOX powder. The product storage is the shelf at the exit: right-click to take out one MOX Powder, sneak and right-click to take out one Uranium Oxide. In reality, 1,000 kg of spent fuel yields 100 kg of MOX fuel and 130 kg of recovered uranium fuel.

See data for 2 kinds
Denitration FurnaceDenitration Furnace
Product StorageProduct Storage

Vitrification Melter, Vitrified Canister Storage, Metal Scrap Container

3 kinds
Vitrification MelterVitrified Canister StorageMetal Scrap Container

A furnace that melts the fission products left after separation into glass at high temperature and solidifies them, and a store for the solidified vitrified waste canisters (up to 20; right-click to take one out). Vitrified waste is meant to be cooled for 30 to 50 years and then buried deep underground (geological disposal), but the site hasn't been decided yet, so it isn't in the game either. The metal scrap container collects the metal pieces that don't dissolve from shearing (cladding and so on) (right-click to take one out).

See data for 3 kinds
Vitrification MelterVitrification Melter
Vitrified Canister StorageVitrified Canister Storage
Metal Scrap ContainerMetal Scrap Container

Plant building parts (steel frame, wall panel, vessel shell, inspection window panel, walkway grating) and process pipe

6 kinds
Reprocessing Steel FrameReprocessing Wall PanelVessel ShellInspection Window PanelWalkway GratingProcess Piping (with Sight Glass)

Build the frame with steel, enclose it with wall panels, show the inside with inspection window panels, lay walkways with grating, and make the bodies of tanks and columns with vessel shells. The process pipe connects the steps; its shape changes with the directions it connects, and during auto-run you can see liquid flowing through its window (sight glass). It can pass through walls and inspection windows.

See data for 6 kinds
Reprocessing Steel FrameReprocessing Steel Frame
Reprocessing Wall PanelReprocessing Wall Panel
Vessel ShellVessel Shell
Inspection Window PanelInspection Window Panel
Walkway GratingWalkway Grating
Process Piping (with Sight Glass)Process Piping (with Sight Glass)

What reprocessing makes (MOX Powder, Uranium Oxide, Vitrified Waste Canister, Hull Scrap)

4 kinds
MOX Powder (Mixed Oxide)Uranium Oxide (Recovered Uranium)Vitrified Waste CanisterMetal Scrap

MOX powder is a mix of uranium and plutonium, and can be put into the BWR reactor nozzle to generate power (only one at a time = pluthermal). Uranium oxide is the recovered uranium (about 95% of spent fuel is still uranium). Vitrified waste and hull scrap don't go back to fuel (sort hull scrap into "Metal resources" in the Trash Bin and it becomes iron ingots again = clearance).

See data for 4 kinds
MOX Powder (Mixed Oxide)MOX Powder (Mixed Oxide)
Uranium Oxide (Recovered Uranium)Uranium Oxide (Recovered Uranium)
Vitrified Waste CanisterVitrified Waste Canister
Metal ScrapMetal Scrap
FOLDER12

Trains

Track, catenary, substations, trains · 15 kinds

Electrified Line Builder (one-shot build)
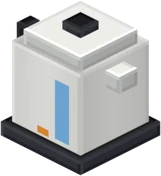
Electric Railway Builder

Builds an electrified loop line all at once (reusable). It builds the track (two 48 m straights and two 25 m radius semicircles: about 253 m around, an area of about 56 x 99 blocks), catenary poles and beams, the overhead wire 5 m above the rails, a station with a 1 m high platform, two substations, DC and AC (connected by wire), and the dead section with signs at their boundary, and puts one commuter train (2 cars) at the station. An outline of the area appears before you place it. Under the track goes ballast that doesn't fall, and if there is water or air below, a bridge pier goes in every 8 m. Once built, connect power to a substation or the wire and trains can run.

You get it
When you take the quest “Get the train moving” (with the phone started)

Train Builder

Train Builder

Puts a whole train on the track (full scale: 1 block = 1 m). Right-click ENECRA track or a curve to choose "commuter train (2 cars)" or "limited express (3 cars)". Near a station it is placed with the front car beside the platform, starting with the doors open. Placed on a connected loop, it starts running on auto-run (stopping at stations with a station name sign). Trains on the same track don't collide: they wait when they get close to the train ahead. It can't be placed on track that is too short (it tells you how many more meters are needed). The builder is used up, and comes back if you undo.

You get it
When you take the quest “Get the train moving” (with the phone started)

Curve Builder (a 25 m radius curve from a track end)

Curve Builder (R25 from a track end)

Lays a 90-degree curve (25 m radius, big enough for full-scale trains to turn) from track laid by hand (reusable). Right-click the end of ENECRA track, or the middle of a straight, and choose to turn right or left. It places the curve's ballast and the track for the exit block, and if there is overhead wire above the starting track, the curve gets overhead wire too. It clears soil and stone in its way (you can undo it). It won't lay track if chests, signs or other machines are in the way. The curve is drawn track, so you can't break or place it one block at a time by hand.

ENECRA Track

ENECRA Track

ENECRA's own track that trains can run on (concrete sleepers, rails and ballast). These trains don't run on Minecraft rails. Only where overhead wire or a catenary pole with power is 1 to 5 blocks directly above do the rail heads glow yellow and trains can run. Track connects automatically to its neighbors; at a corner it looks curved, and with track one level up next to it, it becomes a slope. When you extend the track, the overhead wire and poles extend automatically. Right-click it to see whether it has power or not (on a junction block, to switch the route). A single block can't decide its direction, so lay at least two connected blocks.

Traction Substation

Traction Substation

Where train power starts: it receives power from a power plant and sends it to the overhead wire. There are two kinds, DC (1,500 V) and AC (20,000 V, 60 Hz). It receives power when a powered wire (from a power plant, switchyard or transmission line) connects to any of its six faces. The more power comes in, the farther along the overhead wire it reaches (in reality too, voltage drops with distance, so substations are placed every few kilometers). Two substations connected by wire share power. Right-click for receiving or blackout, the power coming in, how many blocks of overhead wire it reaches, and the power trains are using. Trains use power when they accelerate (Commuter Train 10 kW, Express Train 15 kW; 30% of that while cruising at top speed; nothing while stopped or coasting). What the generators connected to the substation can't cover comes from the surplus on the Power Company's grid, and if that's still not enough, trains run slowly.

Feeder Wire, Catenary Pole, Catenary (Contact Wire), Catenary Beam

4 kinds
Feeder WireCatenary PoleOverhead Wire (Contact Wire)Catenary Beam

The feeder wire is the thick power path from the substation to the catenary poles (just place it; it reaches out in the directions it connects, and the next pole gets a receiving arm). Catenary poles stacked vertically get an arm-topped head only on the top one. The catenary is the wire over the train: only 1 to 5 blocks directly below a live catenary does power flow into the track (catenaries connect to each other and to poles just by placing them, including up and down). The catenary beam is the arm that hangs the catenary from a pole. Breaking a catenary makes the catenary and track on the cut-off side disappear on the spot.

See data for 4 kinds
Feeder WireFeeder Wire
Catenary PoleCatenary Pole
Overhead Wire (Contact Wire)Overhead Wire (Contact Wire)
Catenary BeamCatenary Beam

Dead Section (AC/DC boundary) and sign

2 kinds
Dead Section (AC/DC Boundary)Dead Section Sign

Overhead wire without power at the boundary between DC and AC (the Electrified Line Builder places two, 8 blocks each). Trains pass through on momentum (the cab display shows "Dead section"). The signs stand beside the track at both ends of the section. The real one is north of Tsuruga Station in Japan, a little before the entrance to the Hokuriku Tunnel. The quest "Cross the AC/DC border" is cleared when you are nearby as a train passes through it.
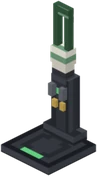
See data for 2 kinds
Dead Section (AC/DC Boundary)Dead Section (AC/DC Boundary)
Dead Section SignDead Section Sign

Station Name Sign (station marker)

Station Name Sign (place near the track)

Placed near the track (within 6 blocks), it makes that spot a station. Trains on auto-run stop with the middle of the train in front of the sign, open only the doors on the platform side, and leave after a chime. Right-click it to see whether it is working as a station. Breaking it removes the station.

Platform Door

Platform Door

A door to line up along the edge of a station platform (a platform screen door). It keeps people from falling onto the tracks. When a train stopped at the station opens its doors, only the platform doors in front of those doors open at the same time, and they close when the train's doors close (a little wider than the train door: up to 1.5 blocks past each end of the door). Place them on the platform floor (1 to 3 blocks above the rails), about 2 to 4.5 blocks to the side of the track center (up to two rows back from the platform edge). They don't open for a train on the far track of an island platform. Right-click for an explanation.

Bridge Pier and Track Ballast (doesn't fall)

2 kinds
Bridge PierTrack Ballast (Doesn't Fall)

Parts that support the track. The ballast is gravel that doesn't fall even with nothing under it. The bridge pier is a column that supports the track where there is water or air below. The Electrified Line Builder places them automatically, but you can place them by hand too.
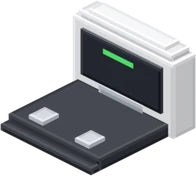
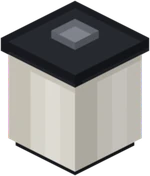
See data for 2 kinds
Bridge PierBridge Pier
Track Ballast (Doesn't Fall)Track Ballast (Doesn't Fall)
The train cab (front and rear cars)
Right-click the cab (the front or rear car) for a menu. While stopped: "Sit in the cab", "Start auto-run" / stop it, "Ride in a passenger car", "Board nearby villagers/animals", "Unload villagers/animals on board" and "Remove this train" (while running, only switching auto-run). In the driver's seat: W = speed up, S = brake (when stopped, opens the doors; W closes them and departs), nothing = coast, jump = horn, sneak = get off. The display shows speed, power / brake, DC / AC / dead section, and meters to the station. On auto-run, if the train has stopped for lack of power, it tells you why (with too few generators, power reaches a shorter stretch of the overhead wire).
RECIPE★

Recipes (32)

Every recipe in v1.7

Crafting table recipes are all available from the start (you don't need to unlock them). Machine recipes are used on the screen you get by right-clicking that machine (it needs power). In the game you can also read them in the phone's Book -> Items Book -> How to make. Minecraft's own materials are shown as colored tags with part of the name (hover for the full name).



Crafting Table (20)

IronPaneIronCopper WireNuggetCopper WireIronCopper WireIron
ENECRA PhoneENECRA Phonemakes 1

Crafting Table: Iron Ingot x4, Glass Pane, Copper Wire x3, Gold Nugget

Solar PanelElectronic CircuitSolar PanelIronIron
Solar GeneratorSolar Generatormakes 1

Crafting Table: Solar Panel x2, Electronic Circuit, Iron Ingot x2

Solar PanelSolar PanelSolar PanelSolar PanelElectronic CircuitSolar PanelIronSolar PanelIron
Advanced Solar GeneratorAdvanced Solar Generatormakes 1

Crafting Table: Solar Panel x6, Electronic Circuit, Iron Ingot x2

GlassResin (Plastic)GlassNeodymium MagnetCoilNeodymium MagnetIronElectronic CircuitIron
Wind GeneratorWind Generatormakes 1

Crafting Table: Glass x2, Resin (Plastic), Neodymium Magnet x2, Coil, Iron Ingot x2, Electronic Circuit

IronIronIronNeodymium MagnetCoilNeodymium MagnetIronElectronic CircuitIron
Hydro GeneratorHydro Generatormakes 1

Crafting Table: Iron Ingot x5, Neodymium Magnet x2, Coil, Electronic Circuit

Copper WireCopper WireResin (Plastic)
WireWiremakes 4

Crafting Table: Copper Wire x2, Resin (Plastic)any arrangement

IronElectronic CircuitIronLithium-ion CellLithium-ion CellLithium-ion CellIronIronIron
BatteryBatterymakes 1

Crafting Table: Iron Ingot x5, Electronic Circuit, Lithium-ion Cell x3

GlassGlassGlassLED ChipElectronic CircuitLED ChipAluminum Ingot
Blue LEDBlue LEDmakes 4

Crafting Table: Glass x3, LED Chip x2, Electronic Circuit, Aluminum Ingot

IronCopper WireIronBricksCauldr.BricksBricksBricksBricks
Silicon Arc FurnaceSilicon Arc Furnacemakes 1

Crafting Table: Iron Ingot x2, Copper Wire, Bricks x5, Cauldron

IronGlassIronCopper WireCauldr.Copper WireIronIronIron
RefinerRefinermakes 1

Crafting Table: Iron Ingot x5, Glass, Copper Wire x2, Cauldron

IronDiam.IronCopper WireCutterCopper WireIronIronIron
Wafer SawWafer Sawmakes 1

Crafting Table: Iron Ingot x5, Diamond, Copper Wire x2, Stonecutter

GlassGlassGlassCopper WireGoldCopper WireIronIronIron
Chip FactoryChip Factorymakes 1

Crafting Table: Glass x3, Copper Wire x2, Gold Ingot, Iron Ingot x3

CopperCopper
Copper WireCopper Wiremakes 8

Crafting Table: Copper Ingot x2

TinTinTinTinSilver IngotCopper Wire
SolderSoldermakes 8

Crafting Table: Tin x4, Silver Ingot, Copper Wireany arrangement

Copper WireCopper WireCopper WireCopper WireIronCopper WireCopper WireCopper WireCopper Wire
CoilCoilmakes 1

Crafting Table: Copper Wire x8, Iron Ingot

NeodymiumIronIron
Neodymium MagnetNeodymium Magnetmakes 2

Crafting Table: Neodymium, Iron Ingot x2any arrangement

GlassResin (Plastic)Copper
Printed Circuit BoardPrinted Circuit Boardmakes 2

Crafting Table: Glass, Resin (Plastic), Copper Ingotany arrangement

Printed Circuit BoardIC ChipSolder
Electronic CircuitElectronic Circuitmakes 1

Crafting Table: Printed Circuit Board, IC Chip, Solderany arrangement

LithiumGraphiteAluminum IngotCopperResin (Plastic)
Lithium-ion CellLithium-ion Cellmakes 2

Crafting Table: Lithium, Graphite, Aluminum Ingot, Copper Ingot, Resin (Plastic)any arrangement

GlassGlassGlassSolar CellCopper WireSolar CellAluminum IngotResin (Plastic)Aluminum Ingot
Solar PanelSolar Panelmakes 1

Crafting Table: Glass x3, Solar Cell x2, Copper Wire, Aluminum Ingot x2, Resin (Plastic)

Silicon Arc FurnaceSilicon Arc Furnace (5)

CoalCoal
GraphiteGraphitemakes 1

Silicon Arc Furnace: Coal x2any arrangement

QuartzQuartzChar
Metallic SiliconMetallic Siliconmakes 1

Silicon Arc Furnace: Nether Quartz x2, Charcoalany arrangement

QuartzQuartzCoal
Metallic SiliconMetallic Siliconmakes 1

Silicon Arc Furnace: Nether Quartz x2, Coalany arrangement

SandSandChar
Metallic SiliconMetallic Siliconmakes 1

Silicon Arc Furnace: Sand x2, Charcoalany arrangement

SandSandCoal
Metallic SiliconMetallic Siliconmakes 1

Silicon Arc Furnace: Sand x2, Coalany arrangement

RefinerRefiner (2)

BauxiteBauxiteBauxiteBauxite
Aluminum IngotAluminum Ingotmakes 1

Refiner: Bauxite x4any arrangement

Metallic Silicon
PolysiliconPolysiliconmakes 1

Refiner: Metallic Siliconany arrangement

Wafer SawWafer Saw (1)

Polysilicon
Silicon WaferSilicon Wafermakes 4

Wafer Saw: Polysiliconany arrangement

Chip FactoryChip Factory (3)

Silicon WaferSilicon WaferSilicon WaferSilicon WaferSilver IngotAluminum Ingot
Solar CellSolar Cellmakes 4

Chip Factory: Silicon Wafer x4, Silver Ingot, Aluminum Ingotany arrangement

Silicon WaferGalliumResin (Plastic)
LED ChipLED Chipmakes 4

Chip Factory: Silicon Wafer, Gallium, Resin (Plastic)any arrangement

Silicon WaferCopperResin (Plastic)
IC ChipIC Chipmakes 4

Chip Factory: Silicon Wafer, Copper Ingot, Resin (Plastic)any arrangement

Furnace / Blast Furnace (1)

Silver Ore
Silver IngotSilver Ingotmakes 1

Furnace / Blast Furnace: Silver Oreany arrangement

DATA★

Key numbers

Numbers taken from v1.7's settings (config)

Power is measured in W (watts) and kW. Inside ENECRA, 1 J/t = 20 W (50 J/t = 1.0 kW = one home).

Generators

Solar Generator
1kW (clear midday; x0.2 in rain; 0 at night)
Advanced Solar Generator
6kW (6 times solar)
Wind Generator
1.2kW to 9.6kW (Y=24 or below to Y=320; about 2.3 kW at Y=64)
Hydro Generator
450 W at its strongest (a waterfall)
Thermal (per generator terminal)
low 128kW, high 240kW
BWR (per generator terminal)
320kW
PWR (rated)
400kW
Emergency diesel generator
2.4kW (within 16 blocks of the reactor; not sold)

Carrying and storing power

Wire
1% lost per block; up to 1024 wires per network
Battery
400,000 J = 8 kWh (one home for about 8 game hours; about 7 real minutes)
LED light
50W each; no hostile mobs within 32 blocks
Projector
150W

Homes and money

One home
1.0 kW (how the Town Power Monitor counts)
Contract (amperage)
10 A = 1 kW, 20 A = 2 kW, 30 A = 3 kW (ask the Electrician)
Basic fee (per month)
10A 311 yen, 20A 624 yen, 30A 935 yen
Power price (buying)
day 31 yen, night 18 yen (per kWh; night = time 13000 to 23000)
Selling power
15 yen per kWh (only as much as the town uses; contract with the Power Company)
Selling to shops
Things you bought at a shop are taken back for 70% of what you paid (the subsidy part isn't included). Things you made or were given sell for the listed price
Breaker panel range
8 front/back/left/right and 6 up/down -> 12 and 8 with wiring work (15,000 yen) -> 16 and 10 (another 25,000 yen)
Game time
1 game day = about 20 real minutes; 1 game hour = about 50 seconds

Power used inside plants

Water pump, high-performance pump
300W
Circulating water pump
600W
Recirculation pump
500W
Condensate pump
200W
Main control panel
100W
BWR station power (total)
about 2.2 kW (2 recirculation pumps, circulating water, feedwater, condensate, main control panel)

Reactors and fuel

One uranium fuel
4 minutes (up to 5 in the reactor = 20 minutes)
Fuel tank
up to 10
Spent fuel cask, spent fuel pool
up to 20
One reprocessing batch
5 spent fuel (the Reprocessor, the reprocessing machine, or a hand-built plant)
Coal for thermal
64 per coal yard; ash and gypsum 1 per 5 coal (up to 20)

Making machines

Silicon Arc Furnace
3kW (runs 20 seconds per use)
Refiner
2kW (runs 20 seconds per use)
Wafer Saw
500W (runs 20 seconds per use)
Chip Factory
800W (runs 20 seconds per use)
Chip Making Machine
40kW
Electric Steelmaking Machine
120kW
Nuclear Fuel Reprocessing Machine
30kW
Metallic Silicon Machine
120kW

Power for residents' shops and factories

Power Company (Power Company)
500W, all day
Electronics Dealer (Electronics Shop)
400W, 9:00 to 18:00
Baker (Bakery)
800W, 4:00 to 7:00
Police Officer (Police Box)
200W, 19:00 to 5:00
Doctor (Clinic)
200W, all day
Stationmaster (Station Kiosk)
400W, 16:00 to 21:00
Factory Manager (Factory)
2kW, 9:00 to 17:00
Weather Forecaster (Weather Station)
200W, 6:00 to 8:00
Professor (Lab)
600W, 10:00 to 16:00
Electrician (Electrician's Shop)
200W, 8:00 to 17:00
Trader (Trading Company)
200W, 9:00 to 17:00
Chipmaker (Chip Factory)
40kW, all day
Steelmaker (Electric Furnace Factory)
6kW, all day (plus 160kW of spare power while the arc furnace is melting)
Silicon Maker (Silicon Factory)
10kW, all day (plus 125kW of spare power while the furnace runs)
Reprocessor (Reprocessing Plant)
30kW, all day
Machine Maker (Machine Maker)
300W, 9:00 to 17:00
Astronomer (Observatory)
100W, 21:00 to 24:00
STEP★

Building and running a PWR

3 builders, 13 stages

The steps for solar, homes and the BWR are in solo missions 1 to 4 of "Teacher Tablet and ENECRA Missions". This section is the PWR (the plant built in the team mission).

Build

  1. Prepare a large flat area (the turbine row is about 70 blocks long). The circulating water intake must touch sea or river water, so pick a spot by the water.
  2. Right-click the ground with the PWR Plant Builder. The full 4-loop set inside the containment is built. Check the main steam and feedwater pipe outlets on the front wall that chat tells you about.
  3. Use the PWR Turbine-Generator Builder near the reactor. It builds the turbine row, condenser, feedwater line, circulating water pumps, intake, outfall, generator, terminal box and isolated-phase bus.
  4. Connect the reactor's nozzles to the turbine row's nozzles with main steam and feedwater pipes (main steam from the orange nozzle to the turbine steam inlet; feedwater from the light-blue nozzle beside the feedwater pump to the reactor's light-blue nozzle).
  5. Make water (sea or river) touch the intake within 2 blocks to the side or below. If you built it away from water, connect it with circulating water pumps and pipes.
  6. Use the PWR Transformer & Switchyard Builder where chat tells you. Check that the isolated-phase bus connects from the generator to the main transformer's LV bushings with the phases in order (A red, B white, C blue).
  7. Run a wire from an outside power plant (solar, wind, hydro and so on) to the station power panel right below the main control panel.
  8. Run overhead power line from the transmission tower to the town's substations or homes (for a model home, the green port on the back of the breaker panel, on the outside wall of the house).

Run

  1. Preparation (while it is cold and stopped): (1) the station power panel has power from outside (2) right-click the volume control tank to fill the primary loop with water (first time only) (3) hold boric acid (powder) and right-click the boric acid batching tank (4) hold fuel assemblies and press "Load fuel (crane)" on the main control panel twice (9 x 2 = 18 assemblies).
  2. Right-click the main control panel to see the current stage, the state of the primary and secondary loops, and a hint. If the button says anything other than "Refresh", press it to go to the next stage. When it says "Refresh", do what the hint says first.
  3. There are 13 stages: cold shutdown -> reactor coolant pumps running -> heating up -> pressurizing -> hot standby -> withdrawing control rods -> diluting boron -> critical -> raising power -> starting the turbine -> generator synchronized (power reaches the town for the first time here) -> raising load -> rated operation (400 kW).
  4. To stop, press "Stop (SCRAM)" on the main control panel. Decay heat continues after stopping, so wait until it cools. When the fuel is used up, use "Refuel" (it only refills the fuel; starting is a separate button).
  5. In the team mission "Light Up the Town with a PWR" (teacher tablet training), four crews (reactor, turbine, power line and town) build one plant together.
HELP★

Troubleshooting

Common problems in v1.7

An appliance won't turn on ("No power")

Appliances run only when connected to an outlet with a [power cord] (just placing one next to an outlet or indoor wiring doesn't work). Hold a power cord and right-click the outlet, then the appliance. If it still won't turn on, right-click the outlet to see the real reason (outside the breaker panel's range, no power at the breaker panel, the breaker, not enough power).

An LED inside the house won't light

Indoors, connect the LED to an outlet with a power cord (placing it next to an appliance isn't enough). Outdoors, place the LED touching a wire that has power.

Homes black out at night

Solar makes 0 at night. Connect a battery by wire and right-click it to set it to "Send" (a battery placed by hand starts in "Store only"). Or add generators that run at night (wind, hydro, thermal, nuclear).

The breaker trips

Right-click the breaker panel (the first click only resets it). Using many appliances at once goes over the contract (10 A = 1 kW). The electric kettle (1200 W) alone trips a 10 A contract. Ask the Electrician in town to change the contract to 20 A or 30 A.

A making machine won't open

Connect a generator by wire to the green port on the back of the machine (there are no ports on the front or sides, and it doesn't draw from a generator placed right next to it) and wait for power to build up (when the lamp turns green, it can run). It also won't open if the connected generators' [current] output is less than the machine needs (3 kW for the arc furnace): add generators, or connect a battery set to "Send" (up to 3 kW each).

A pump is stopped (the wire is connected)

It doesn't run when the network's generation is less than the pump uses (a BWR's station power totals about 2.2 kW). The pump's screen shows the network's generation and its power use in kW. Add generators.

Nothing happens when I press the BWR start button

The "what to do next" line on the main control panel is what is missing now. Before starting, it also checks that a turbine is connected by steam pipe, that the condenser is cooled, and that water loops back from the condenser to feedwater.

The BWR says to send spent fuel to the pool

Used fuel has built up in the reactor. Connect it with a fuel pipe to the spent fuel pool (behind the reactor if you used the builder) or a spent fuel cask. Right-click the pool to take out all the fuel inside.

A train stops or won't run

Check that there is powered overhead wire 1 to 5 blocks directly above the track. Right-click a substation to see how many blocks of overhead wire the power reaches (fewer generators means a shorter reach). When a train on auto-run has stopped, the reason is shown. When the substation doesn't have enough power, trains run slowly (the cab shows that power is short).

I built the transformer and switchyard, but the house gets no power

Connect a wire from the Generator Terminal to the Plant Inlet's green port (if you built it by right-clicking the terminal, put wires in the two blocks in front of the terminal and below it). Run the wire to the house from the Plant Outlet's green port. Power goes in only at the Plant Inlet's green port and out only at the Plant Outlet's green port: wires attached to the sides or top of the transformer or other equipment don't carry power.

A resident's shop stays "Closed"

Connect generator power by wire to the breaker panel at the back of the shop (without power, the sign light is off and the resident looks troubled when you talk). Also check the opening hours (the Baker is 4:00 to 7:00, for example).

I built something in the wrong place

Builder Undo takes back the builders you used, newest first, one at a time (up to 8; the builder returns to your inventory). After you leave the world, you can't undo.

The builder didn't build (red dots appeared)

At a spot that overlaps with something else, the first right-click doesn't build: it shows the overlapping blocks (red dots) and which way and how far to move. Move it and try again, or right-click the same spot again within 30 seconds to build it overlapping anyway.

The phone won't start

While training is running on the teacher tablet, the ENECRA Phone can't be started.

I want the screens in English (or Japanese)

Use the globe button on the ENECRA Phone's start screen or power screen (the world owner's phone = everyone; anyone else = only themselves), or Language on the teacher tablet (everyone). Block and item names follow Minecraft's own language setting.

The contents were taken from the v1.7 download (the icons were rendered from the released pack).